The best projector for sewing patterns is the one whose throw ratio fits the distance between your mount and your table, whose resolution keeps each pixel well under a millimetre at your image width, and which the manufacturer allows to be mounted pointing straight down. Brightness matters less than for a home cinema because the image is small and you can dim the room. Work out the throw ratio first - it rules out most models before brand or price come into it.
We do not rank brands here: models change every year and we have not tested them side by side. Instead, this is how to read a spec sheet for pattern work.
Start with the geometry: throw ratio
Throw ratio is the distance from the lens to the image divided by the image width:
throw ratio = throw distance ÷ image width
So for your table:
needed throw ratio = (lens-to-table distance) ÷ (width you want to cover)
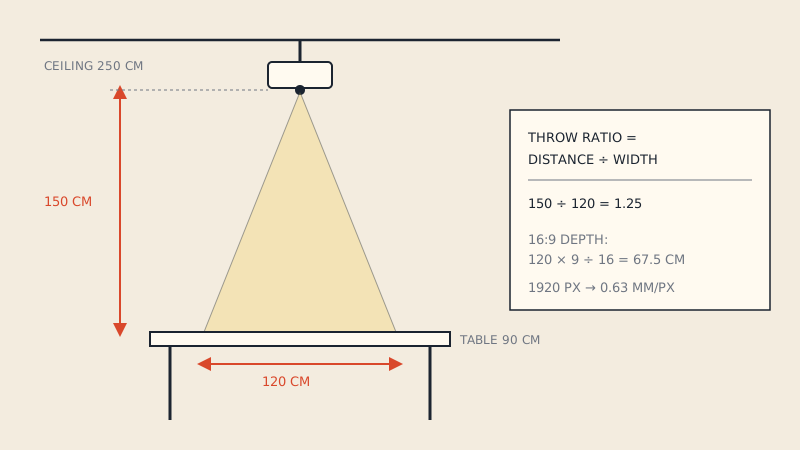
Worked example
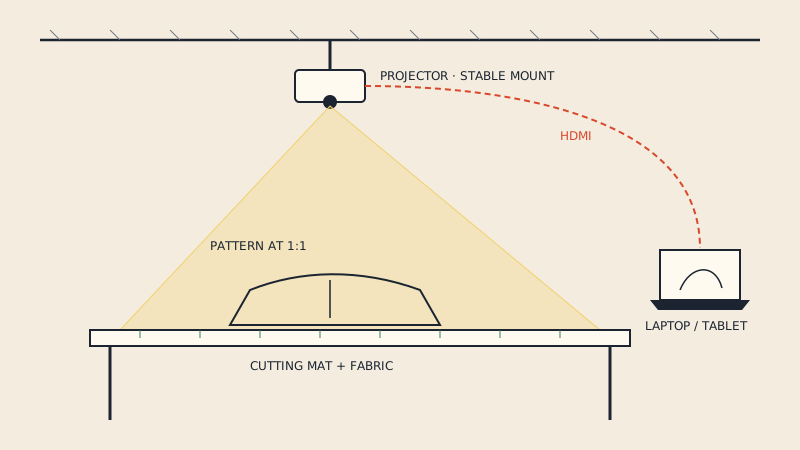
- Ceiling height: 250 cm. Table height: 90 cm. Projector hangs so the lens sits about 10 cm below the ceiling.
- Lens-to-table distance: 250 − 90 − 10 = 150 cm.
- Width you want to cover: 120 cm (a large cutting mat).
- Needed throw ratio: 150 ÷ 120 = 1.25.
A projector listed with a throw ratio of 1.25:1 - or a zoom range that includes 1.25 - covers 120 cm from that height. A model with a fixed 1.6:1 ratio would only cover 150 ÷ 1.6 ≈ 94 cm.
Quick table
Projected width for a given lens-to-table distance and throw ratio:
| Throw ratio | 120 cm distance | 150 cm distance | 180 cm distance |
|---|---|---|---|
| 0.8 | 150 cm | 188 cm | 225 cm |
| 1.0 | 120 cm | 150 cm | 180 cm |
| 1.25 | 96 cm | 120 cm | 144 cm |
| 1.5 | 80 cm | 100 cm | 120 cm |
| 2.0 | 60 cm | 75 cm | 90 cm |
Projectors are often grouped loosely as standard throw (ratio above roughly 1.0) and short throw (below roughly 1.0); manufacturers draw the line in slightly different places. Ultra-short-throw models are designed to sit almost against a wall and project steeply upwards, which is awkward to align over a table.
Don't forget the other dimension
Most projectors are 16:9 or 16:10. At 120 cm wide, a 16:9 image is 67.5 cm deep (120 × 9 ÷ 16). If you want to cover a deep table, rotate the projector so the long side runs along the table's length - or accept panning in one direction.
Image offset
Many projectors do not project straight out of the lens centre; the image is offset upwards (or downwards when ceiling-mounted). Pointed down at a table, the image lands to one side of the point directly under the lens. Spec sheets give this as offset, often a percentage. Allow for it when you choose where to mount.
Mounting: check this before anything else
Not every projector is approved for pointing straight down. Cooling, lamp design and fan direction can make vertical or steeply tilted operation unsupported, and running it that way may shorten its life or void the warranty.
Look in the manual or spec sheet for installation options such as "360° installation", "portrait mode", or a tilt range that includes vertical. If the projector is only approved for horizontal use, the usual workaround is a front-surface mirror at 45° under a horizontally mounted projector. It works, but it reverses the image (most projectors have a rear or mirror setting to fix that) and adds one more thing to align.
Mounting options:
| Mount | Pros | Cons |
|---|---|---|
| Ceiling mount | Most stable, out of the way | Installation work; fixed height |
| Wall arm or boom | Easy to reach, adjustable | Must be rigid; long arms flex |
| Heavy floor tripod or stand | No drilling | Easy to knock; uses floor space |
| Shelf or cabinet top with mirror | Simple, keeps projector horizontal | Mirror alignment; reversed image |
Stability matters more than convenience: every bump means checking calibration again.
Resolution: millimetres per pixel
The projector cannot draw a line finer than one pixel. Divide your image width by the horizontal resolution to see what one pixel is on the table:
| Native resolution | Width in pixels | Pixel size at 120 cm wide | At 150 cm wide |
|---|---|---|---|
| 1280 × 720 / 800 | 1280 | 0.94 mm | 1.17 mm |
| 1920 × 1080 / 1200 | 1920 | 0.63 mm | 0.78 mm |
| 3840 × 2160 | 3840 | 0.31 mm | 0.39 mm |
At 1280 pixels across a large table, thin pattern lines become steppy and curves look jagged; 1920 is a common practical minimum for pattern work. Use the native resolution, not the "supported" input resolution: many inexpensive projectors accept a 1080p or 4K signal but display it on a lower-resolution panel.
Brightness
Brightness specs are usually in ANSI lumens, a standardised measurement. Some listings quote other figures ("lumens" without ANSI, light-source lumens, or lux) that are not directly comparable; treat those with caution.
For sewing, the projected area is small compared with a cinema screen, which concentrates the light, and you can dim the room. More brightness helps if your room cannot be darkened or you often cut dark fabric. Very bright projectors are often larger, louder and hotter - not ideal hanging over your head.
Other specs that matter
- Zoom range. A zoom lens lets you fine-tune image width to your mat. Lock it after calibration.
- Lens shift. Moves the image without digital keystone, so lines stay sharp. Useful, but less common on lower-priced models.
- Focus. Manual focus is fine and stays put; autofocus that re-adjusts can shift scale slightly. Check whether it can be switched off.
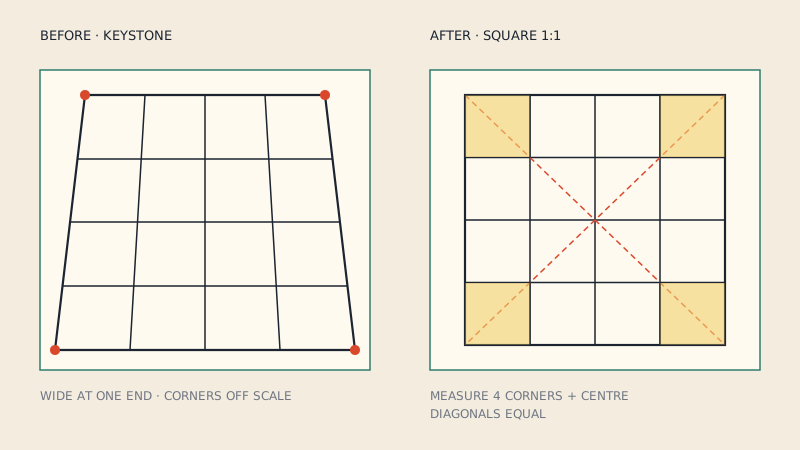
- Keystone. Digital keystone resamples the image. Treat it as an emergency fix, not a feature.
- Fan noise and heat. You will stand under it for hours. Spec sheets list noise in dB; lower is better.
- Inputs. HDMI is the most predictable. Wireless casting can add lag or compress fine lines.
- Light source. Lamp, LED and laser differ in lifespan, warm-up time and running cost; check the rated life in the spec sheet.
- Weight and mounting holes. Confirm the mount is rated for the projector's weight and fits its threaded inserts.
A checklist before buying
- Measure lens-to-table distance and the width you want to cover.
- Calculate the needed throw ratio.
- Shortlist models whose throw ratio or zoom range includes it.
- Check each one's manual for downward or 360° installation.
- Check native resolution (1920 pixels wide or more is a sensible baseline).
- Compare ANSI lumens, noise, zoom and lens shift.
- Check the image offset and decide where the mount goes.
Once it is installed, the projector sewing guide walks through a first session, and projector files explains which pattern files project best.
FAQ
What throw ratio do I need for a sewing projector?
Divide the distance from the lens to the table by the width you want to cover. For example, 150 cm above the table and 120 cm wide needs a throw ratio of about 1.25; look for a projector whose ratio or zoom range includes that number.
Can any projector be mounted pointing down?
No. Some projectors are not approved for vertical or steeply tilted operation because of cooling. Check the manual for 360° or portrait installation; otherwise mount it horizontally and use a 45° mirror.
What resolution projector is best for sewing patterns?
A native resolution of at least 1920 pixels wide is a sensible minimum, which gives pixels of about 0.6-0.8 mm across a 120-150 cm image. Check the native panel resolution, not the supported input resolution.
How bright does a sewing projector need to be?
Less bright than a cinema projector, because the image is small and the room can be dimmed. Extra brightness helps in rooms you cannot darken or on dark fabric; compare ANSI lumen figures only.
Is a short-throw projector better for sewing?
It is better for low ceilings, where a standard projector cannot cover enough width from the available height. Calculate the throw ratio you need; if it is below about 1.0, you need a short-throw model.