To calibrate a projector for sewing, first align it physically so the beam hits the table square-on, then project a grid of known size and adjust until it matches your cutting mat - in the centre, in all four corners and along both diagonals. Fix shape problems with the projector's position first and keystone correction only as a last resort, and fix scale with the PDF reader's zoom or a projection app. Finish by projecting a pattern's test square and measuring it.
This is the setup step that makes projector sewing accurate. Done well once, it only needs a quick check before each session.
What calibration has to fix
A projected image can be wrong in three separate ways, and each has its own fix.
| Problem | What you see | Fix |
|---|---|---|
| Keystone (trapezoid) | One end of the image wider than the other | Level the projector; physical tilt first, keystone correction last |
| Rotation | Grid lines not parallel to the mat edge | Rotate the projector or the mat |
| Scale | Grid squares too big or too small | PDF reader zoom, or a projection app's scale setting |
| Uneven scale | Centre correct, corners off | Usually residual keystone or lens distortion; re-level and re-check |
| Soft lines | Fuzzy edges | Focus; reduce digital keystone |
Work in that order. Scale set before the shape is square will be wrong at the edges, however careful you are in the middle.
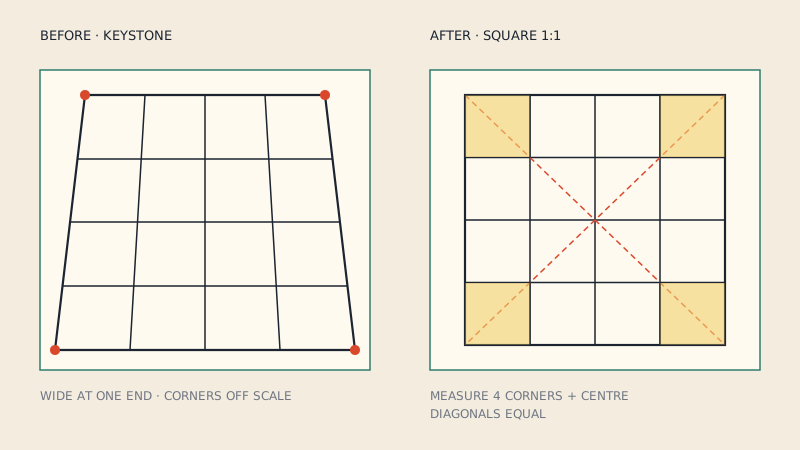
Step 1: align the projector physically
A projector pointing straight down at the table produces a rectangle. Tilt it a few degrees and you get a trapezoid.
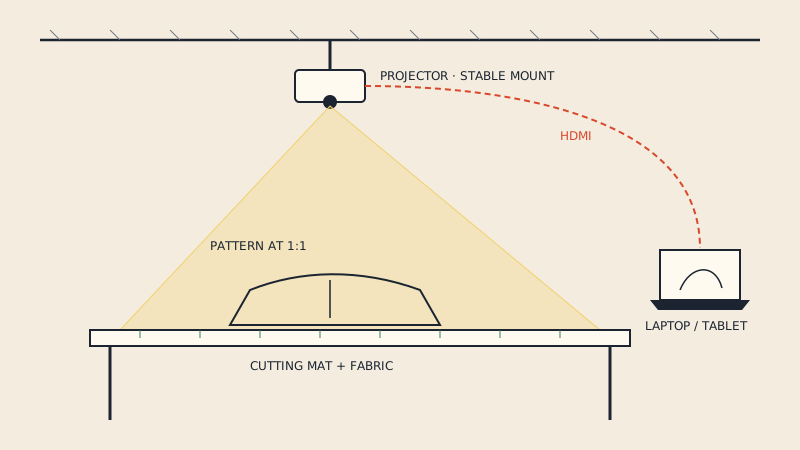
- Mount it above the centre of the area you want to cover, with the lens pointing straight down (or a mirror at 45°, if your setup uses one).
- Level it with a small spirit level on the projector body, in both directions.
- Focus on the table surface, not on the fabric pile or a raised mat edge.
- Lock the zoom ring and the mount. Any later movement undoes the calibration.
About keystone correction
Most projectors have keystone correction, and many have automatic keystone. Optical lens shift (on projectors that have it) moves the image without distorting it. Digital keystone, by contrast, reshapes the image by resampling: it squeezes part of the picture into fewer pixels, which makes thin lines softer and slightly uneven in thickness.
For pattern work, try to get a square image by positioning alone and leave digital keystone at zero. If you cannot avoid it, use as little as possible and turn off automatic keystone so it does not change between sessions.
Step 2: match the computer to the projector
Scale depends on how many pixels the computer sends, so make that predictable:
- Set the output to the projector's native resolution. A non-native resolution is rescaled by the projector and blurs lines.
- Choose "duplicate" or "extend" display deliberately. Extending, with the PDF on the projector screen only, usually gives the most control.
- Keep the operating system's display scaling constant. If it changes, your zoom figure changes too.
- Use the same computer and cable each time. A different laptop means a new calibration.
Step 3: project a grid and set the scale
You need a grid file with lines at a known spacing, such as every 5 cm or every 1". Many pattern designers and projection communities share calibration grids; you can also draw one as a PDF page in any vector program.
With a PDF reader
- Open the grid at a zoom of around 100 % on the projector screen.
- Measure the distance between two grid lines far apart - say ten squares - on the mat.
- Change the zoom until that distance is correct. If 10 squares of 5 cm measure 46 cm at 100 % zoom, try 100 × 50 / 46, about 108.7 %.
- Repeat until you are within a millimetre or two over the longest distance you can measure.
- Write the zoom figure down, and the resolution and display scaling with it. Use exactly this zoom for every pattern.
Some readers only accept zoom in whole or one-decimal percentages, which limits fine adjustment over a large area. That is one reason dedicated apps exist.
With a projection app
Dedicated pattern-projection programs, including free and open-source ones, ask you to project a calibration pattern and mark its corners on the mat, then correct scale, rotation and perspective in software. This handles residual keystone better than reader zoom, because the correction is applied to the pattern itself rather than to the whole image. Follow the app's own instructions; the checks below still apply.
Step 4: check corners and diagonals
The centre always looks right. The corners are where calibration fails.
- Measure a grid square in each corner of the projected area, and one in the middle.
- Measure both full diagonals of the largest grid rectangle. They should be equal; if one is longer, the image is still a trapezoid or parallelogram.
- Measure a long straight line along each edge with a long ruler or a tape laid flat. It should be straight and the right length.
As a rough guide, aim for errors of 1-2 mm or less across the area you will cut in. If the corners are worse than that, use only the central part of the image for cutting and pan the pattern instead.
Step 5: confirm on a real pattern
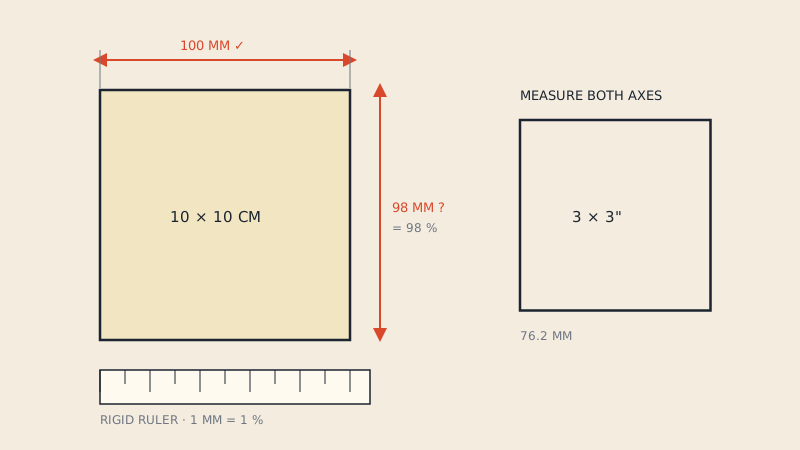
Open a pattern at your calibrated zoom and project its test square onto the mat. Measure both directions - the procedure and tolerance are explained in our test square guide. This catches the one thing a grid file cannot: a pattern PDF that is itself the wrong size.
Matching the mat to the projection
| Mat size (common) | Approx. dimensions | Fits |
|---|---|---|
| A2 | 60 × 45 cm (24 × 18") | Small pieces only; often smaller than the projected area |
| A1 | 90 × 60 cm (36 × 24") | Most single pieces; frequent panning |
| A0 | 120 × 90 cm (48 × 36") | Most garment pieces; a common choice for projection |
| Larger sizes | 150-180 cm long and up | Long pieces such as trousers and coats |
Mat nominal sizes are approximate and vary by maker - measure yours. A mat slightly smaller than the projected area is ideal: the whole cutting surface is covered by the image, and the mat's own grid becomes your permanent calibration check.
Keeping calibration stable
- Mark the mat's position on the table with tape at two corners.
- Do not lean on or knock the mount. If you do, check a corner square before cutting.
- Check at the start of every session: one grid square in the centre and one corner takes a minute.
- Recalibrate when anything changes: a new laptop, a different cable or adapter, a projector firmware update, display settings, mount height, or a new mat.
- Use the same fabric height. Thick fabric or several layers raise the cutting surface and slightly enlarge the image. For very thick stacks, focus and measure on top of the fabric.
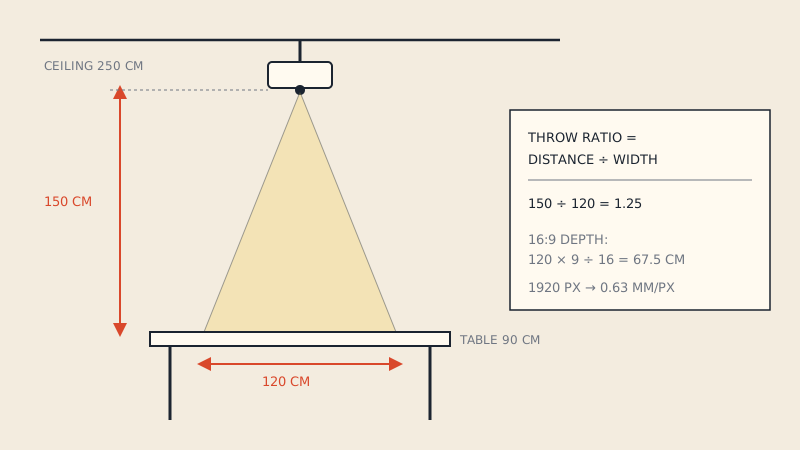
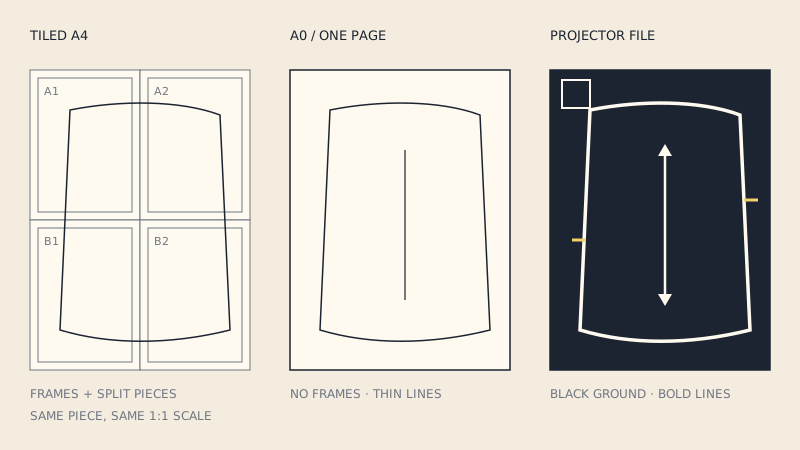
Choosing a projector that makes calibration easier - one with the right throw ratio for your ceiling, and ideally lens shift - is covered in choosing a projector for sewing. For the files themselves, see projector files.
FAQ
How do I calibrate a projector for sewing patterns?
Align the projector so it points straight down and the image is rectangular, project a grid of known spacing, and adjust the PDF reader zoom or a projection app until the grid matches your mat. Then check corners and diagonals and project a test square.
Should I use keystone correction for projector sewing?
Use physical positioning first. Digital keystone resamples the image and softens thin lines, so keep it at zero or as low as possible; optical lens shift, if your projector has it, does not distort the image.
How do I check a projector calibration is accurate?
Measure a grid square in each corner and in the centre, compare both diagonals of the largest rectangle, and project a pattern's test square. All should be within a millimetre or two.
How often do I need to recalibrate my projector?
Only when something changes: the projector or mount moves, you change computer, cable, resolution or display scaling, or you use a different mat. A quick check of one square at the start of each session catches accidental movement.
What size cutting mat do I need for projector sewing?
One slightly smaller than your projected area, so the image covers the whole mat. An A0-size mat, about 120 × 90 cm, is a common choice; measure your projected area first.