A pattern digitizer is a large flat tablet with a sensing grid under its surface, used with a hand-held puck to record points from a paper pattern directly into pattern CAD. You tape the pattern to the board, place the puck's crosshair on each point along the outline, and press a button that tells the software what kind of point it is. Boards remain in use in production rooms that receive paper patterns regularly; for occasional digitizing, cheaper routes usually make more sense.
How a digitizer board works
The tablet
Under the work surface sits a grid of wires. The puck contains a coil, and the board detects its position over the grid electromagnetically, then sends coordinates to the computer. Because the position is sensed through the surface, the pattern paper on top does not interfere, and the board can be read anywhere within its active area.
Boards for pattern work are large, often big enough for a full trouser leg or a long coat panel. Smaller boards exist, but then long pieces have to be digitized in parts and joined, which brings back the problem a board is supposed to avoid.
The puck
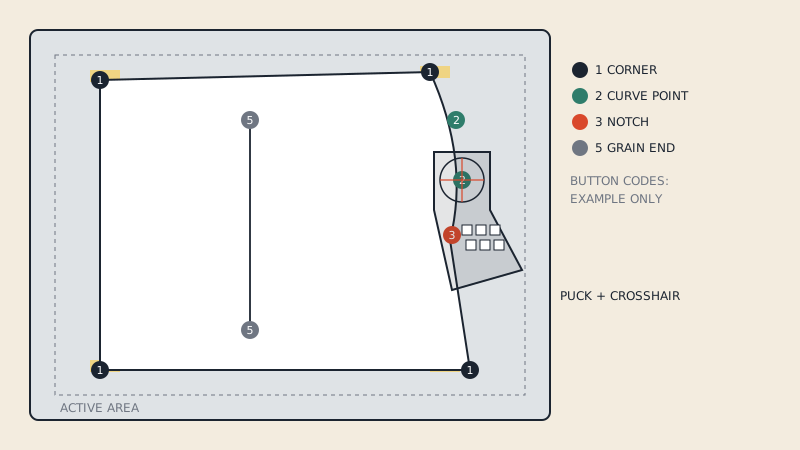
The puck is a small hand-held cursor with a clear window and a fine crosshair, plus a set of numbered buttons, commonly 12 or 16. The operator places the crosshair exactly over a point and presses a button. The button number is the instruction.
Point codes
The CAD program maps each button to a meaning. A typical set looks like this; the exact mapping depends on the software and can usually be customised.
| Puck button (example) | Meaning | Becomes in the piece |
|---|---|---|
| 1 | Corner or end point | Turn point on the outline |
| 2 | Curve point | Point the software smooths through |
| 3 | Notch | Notch at that position |
| 4 | Grade point | Point with a grade rule reference |
| 5 | Grain line start / end | Grain line |
| 6 | Internal line | Dart leg, pocket, placement |
| 7 | Drill hole | Drill or button mark |
| 8 | Close piece | Finishes the outline |
Labelled as an example only: button numbers and their meanings are not standardised across systems. The useful idea is that a board records more than coordinates. The operator classifies every point while digitizing, which is why pieces from a board arrive with notches, grain lines and corners already in place.
The digitizing procedure
- Prepare the pattern. Mark corners, grade points and notches clearly on the paper if they are not obvious. Decide the start point and direction, usually clockwise from a known corner.
- Tape it flat. No bubbles or waves. Paper lifted off the surface records slightly wrong positions at the edges.
- Enter piece information. Name, size, quantity, fabric, depending on the software.
- Digitize the grain line first in many workflows, because some programs use it to orient the piece.
- Go around the outline. Corners as corner points, curves with enough points to describe them: more on tight curves such as an armhole, fewer on gentle ones.
- Mark notches as you pass them.
- Add internal elements: darts, pocket lines, drill holes.
- Close the piece and check it on screen against the paper.
Experienced operators settle into a rhythm, but complex pieces still take time. The board does not trace; a person does.
How accurate is a digitizer board?
Accuracy has two parts.
The hardware. Manufacturers specify resolution and accuracy for their boards, and professional pattern boards are designed for fine tolerances. Check the specification of the specific model, and remember that resolution (the smallest step the board can report) is not the same as accuracy (how close the reported position is to the true one).
The operator and the paper. In practice, these usually dominate:
- placing the crosshair on the centre of a pencil line rather than its edge
- choosing enough curve points; too few flattens curves, too many makes them wobbly
- paper that has stretched, curled or was traced inaccurately in the first place
A careful operator with flat paper produces pieces that match the original closely; a hurried one produces bumpy curves on a perfectly accurate board. Walking the seams of the digitized pieces is still the best check.
Who still needs one
A board makes sense when:
- paper patterns arrive regularly, for example a production room working with designers who draft by hand
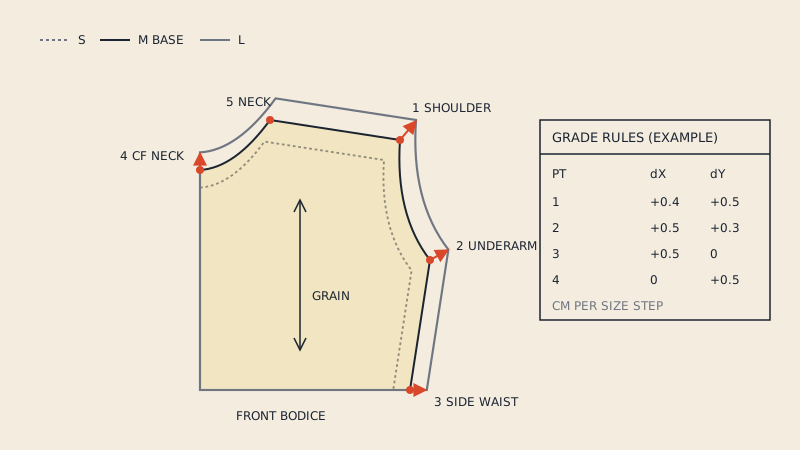
- the pattern is the master, and you need points classified as grade points so existing grade rules can be applied in CAD
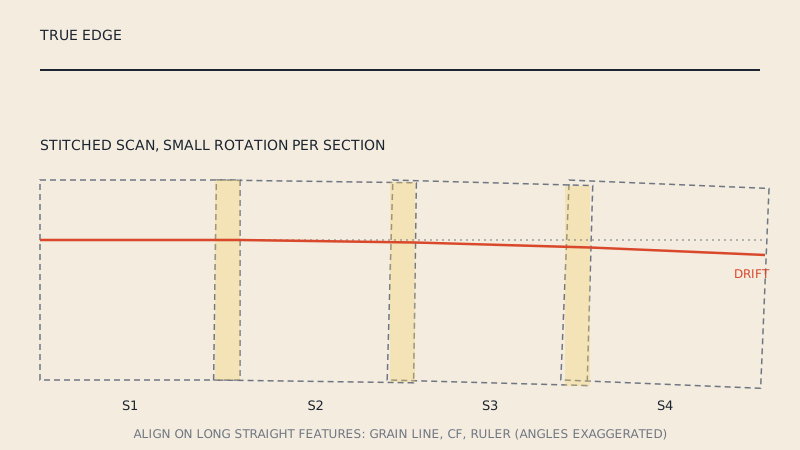
- pieces are large, and you want them captured in one pass without image stitching
- the CAD system is built around it, with digitizing modules and point codes already set up
Graded nests can be digitized too: some systems let you digitize the base size and the grade points, or several sizes stacked, depending on the software. Grading itself is covered in grading by hand vs in CAD.
Who probably does not
- Home sewists digitizing a handful of patterns a year. A board is a large, specialised device.
- Designers who already draft digitally. The pattern is already vector.
- Anyone starting from PDF patterns. Most purchased PDF patterns are vector; printing them to digitize on a board loses precision instead of gaining it.
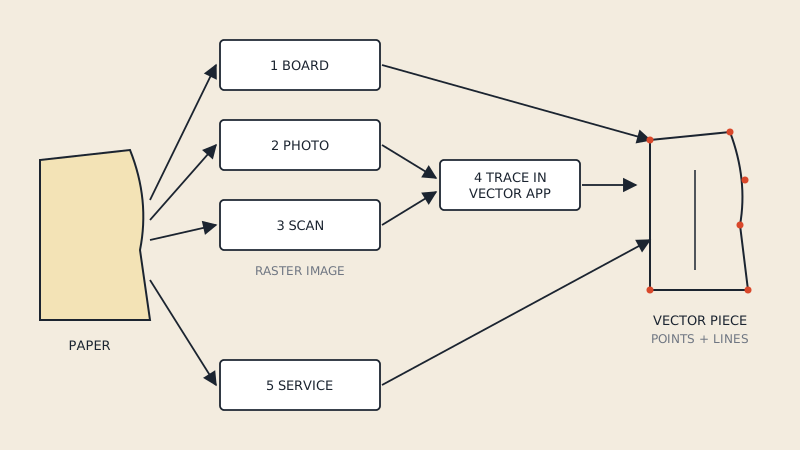
Alternatives to a digitizer board
| Alternative | How it captures | Trade-off |
|---|---|---|
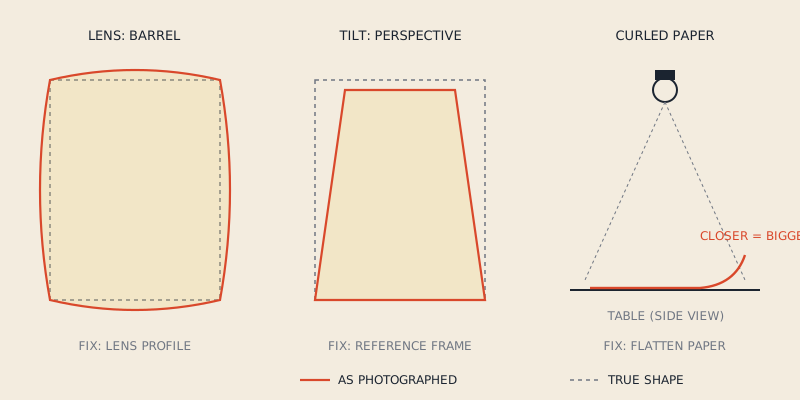
| Photo + calibration | Camera image, corrected for perspective and lens | Fast capture; accuracy depends on calibration |
| Scan + trace | Flatbed sections or wide-format scan, traced in software | Even image; stitching and tracing time |
| Trace in vector app | Draw over an image in Inkscape or Illustrator | Cheap; slow, limited by the image |
| Digitizing service | Someone else, often on a board | No equipment; cost per job |
| Convert existing vector PDF | Extract geometry already in the file | Only for vector PDFs, not paper or scans |
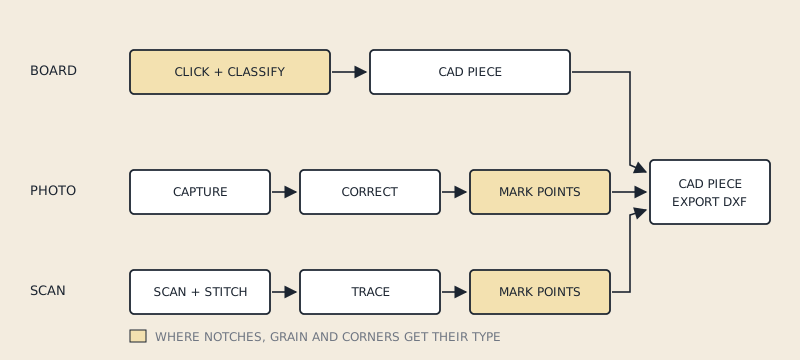
Photo-based systems are the most common modern alternative. They work differently: a camera captures the whole pattern at once and software finds the outline, then an operator marks notches and other points on screen. The photo digitizing guide goes into calibration and limits, and how to scan a sewing pattern covers the scanner route. All five routes are compared side by side in how to digitize sewing patterns.
Output: what you get from a board
Pieces digitized on a board live in the CAD system's own format. To share them with another program or a factory, you export them, usually as DXF AAMA or ASTM, where outlines, notches, grain lines and internal lines go onto numbered layers. The AAMA DXF layers reference explains what ends up where.
If what you have is a vector PDF rather than paper, you do not need a board at all. Our converter extracts the pieces from the PDF into DXF AAMA. It does not handle paper patterns or scans, so for those, one of the methods above is the way in.
FAQ
What is a pattern digitizer?
It is a large tablet with a puck used to record points from a paper pattern into pattern CAD. Each puck button marks a type of point, such as a corner, curve point, notch or grain line end.
Is a digitizer board better than photographing a pattern?
It avoids camera distortion and records point types as you go, which suits regular production work. A well-calibrated photo system can be faster for capture; the better choice depends on volume, budget and the CAD system you use.
Can I use a graphics tablet as a pattern digitizer?
A graphics tablet is designed for drawing on screen, not for reading positions from paper laid on top of it at full scale, and it is usually far smaller than a pattern piece. Pattern CAD digitizing modules expect a digitizer board.
Do I need a digitizer to convert a PDF pattern?
No. A vector PDF already contains the lines, so it can be converted directly. A digitizer is only needed when the pattern exists on paper.