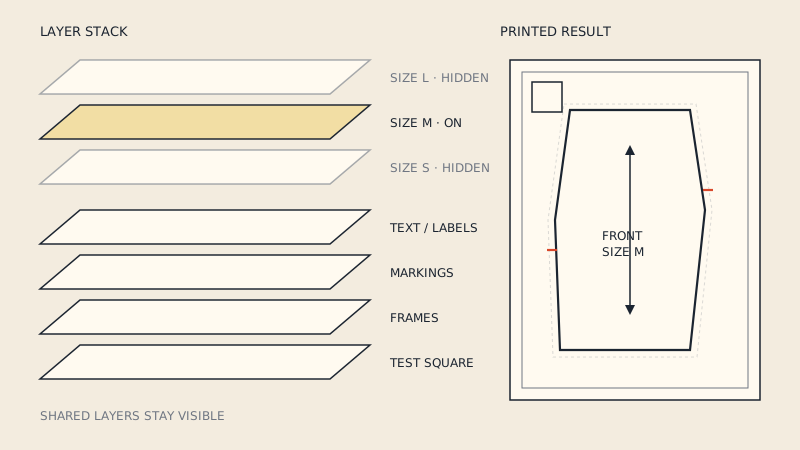
Many multi-size PDF patterns put each size on its own layer, so you can hide every size except yours before printing. Open the file in a desktop reader that supports layers (Adobe Acrobat Reader does), open the Layers panel, click the eye icon next to each size you do not need, keep the layers for text, markings and the test square visible, then print at 100 %. If the file has no layers, or your reader ignores them, you can still isolate your size by colour, line style or tracing.
What PDF layers actually are
In PDF terms, layers are "optional content groups": named sets of lines and text that the reader can show or hide. A pattern designer draws each size's cut line, notches and markings on its own layer, plus shared layers for things every size needs.
A typical layer list looks like this:
| Layer | Contains | Keep visible? |
|---|---|---|
| Size 6, 8, 10 ... or XS, S, M ... | That size's cut line, sometimes its notches | Only your size (or two, for blending) |
| Text / Info / Labels | Piece names, grain lines, "cut 2", page codes | Yes |
| Markings / Notches | Shared notches, darts, placement marks | Yes, unless notches are per size |
| Grid / Tiles / Frames | Page frames and match marks | Yes for home printing |
| Test square | The scale-check box | Yes |
| Cover / Instructions | Line art, size chart | Optional |
The names are up to the designer. Read the layer list before you start switching things off - "All sizes" or "Base" layers sometimes hold lines that every size uses.
Step by step in Adobe Acrobat Reader
- Download the PDF and open it in Acrobat Reader, not in a browser tab.
- Open the Layers panel. It sits in the panel on the left side of the window, with an icon that looks like stacked sheets. If you cannot see it, look under the View menu's show/hide options for the side or navigation panels and enable Layers. The exact menu wording has changed between Reader versions; the panel itself works the same way.
- Expand the layer list if it is collapsed under the file name.
- Click the eye icon next to each size you do not need. The lines disappear from the page view immediately.
- Scroll through a few pages to check that your size and all markings are still there. Look especially for notches and grain lines.
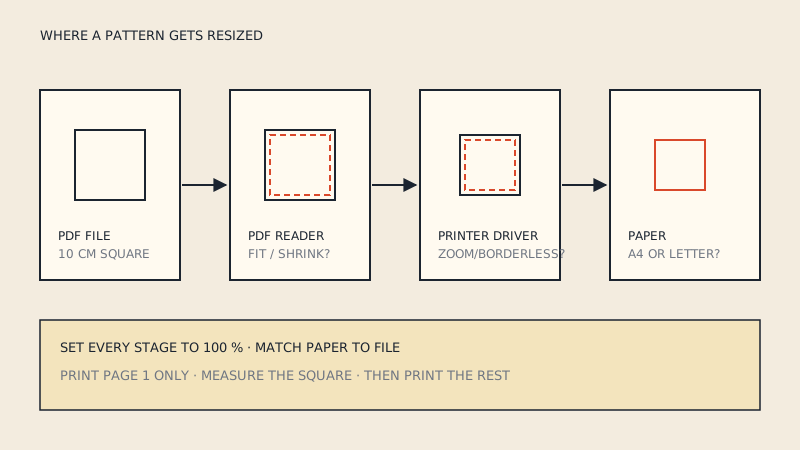
- Print at Actual size. Acrobat prints what is visible on screen. For scale settings see PDF pattern not printing to scale.
If you close and reopen the file, the layers may reset to their default visibility. Hide them again before reprinting a page.
Printing two sizes for blending
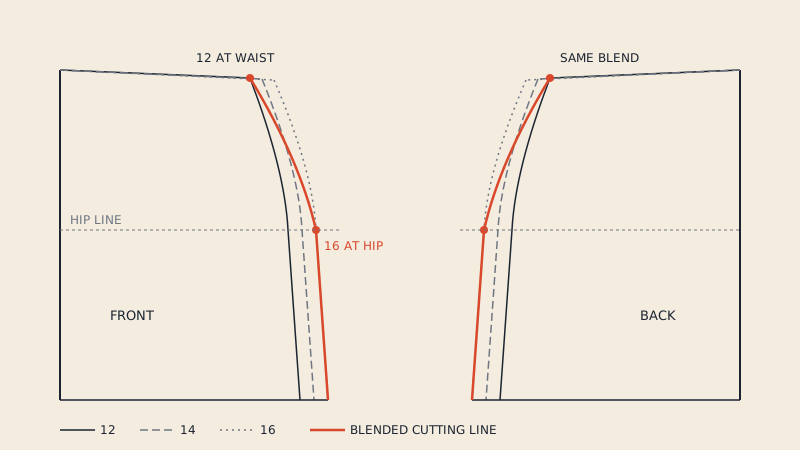
If you are between sizes - say a size 12 bust and size 14 hip - leave both layers visible. You will draw the blend line by hand between them. Our guide to multi-size sewing patterns explains how to grade between sizes at the waist or hip.
Other readers
Layer support varies, and reader behaviour changes with updates, so always check the screen before printing.
- Desktop PDF readers such as Acrobat Reader and several third-party readers on Windows and Linux show a layers panel and print only visible layers.
- macOS Preview does not offer a layers panel, so it shows and prints every size.
- Browser viewers differ. Some show no layer list at all; others list layers but behave differently when printing. Download the file and use a desktop reader to be sure.
- Tablet and phone apps often display all layers. Fine for reading instructions, not for preparing a print.
A quick test: if you switch off a size and it is still visible on the page, the reader is ignoring layers or the pattern was not built with them.
Why print only your size
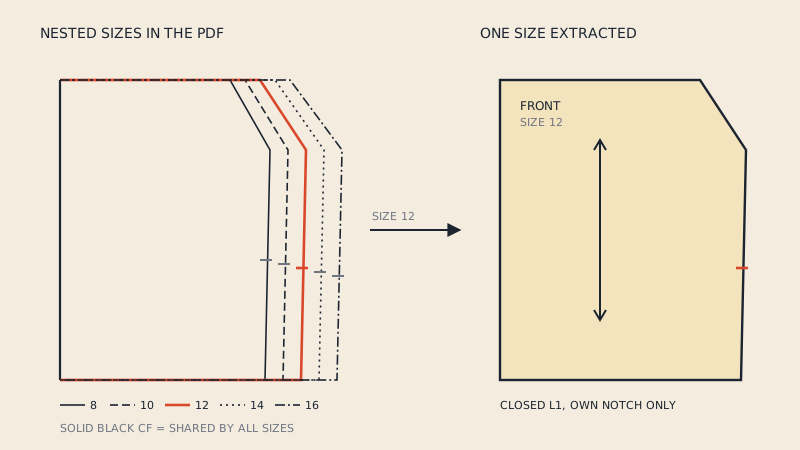
- Fewer mistakes. With nine nested lines, it is easy to cut along the wrong one where lines cross at the side seam or armhole.
- Easier tracing. A single line is faster to trace onto pattern paper.
- Less ink. Not a lot per page, but noticeable on a 40-page coat.
- Clean files for others. If you print a copy-shop sheet for a friend who sews another size, you can print just theirs.
It does not reduce the page count: the pages are laid out to fit the largest size, so all of them still print.
When the pattern has no layers
Not every pattern uses layers, and some older files were flattened. You still have options.
- Use colour. Many patterns draw each size in a different colour. Print in colour and highlight your line with a marker before cutting.
- Use line styles. Black-and-white patterns often give each size a dash pattern. Find yours in the size legend, usually on the first pattern page, and trace over it.
- Trace your size. Print all sizes, assemble, then trace only your size onto paper. You keep the master for later and get a clean single-size piece. See how to trace a sewing pattern.
- Check the instructions. Some designers explain where the layers are or provide separate files per size.
Do not try to delete lines in a PDF editor: it is slow, easy to get wrong, and you risk removing shared markings.
Layers and copy-shop or projector files
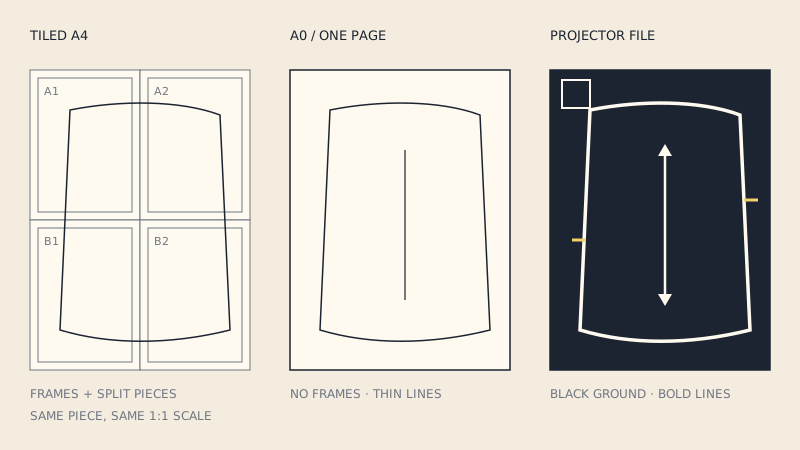
Layers matter for large sheets too. Ask the copy shop to print from a file with only your layers visible - some shops print every layer whatever you set on screen, so the safest route is to print to a new PDF from your reader with only your size visible and send that file instead. Check that the new PDF keeps the original page size and measure its test square on screen with the reader's measuring tool, or on the first print. With a projector, switching off the other sizes makes the projected lines far easier to follow on fabric; projector files covers that workflow.
Layers and CAD
If you want the pattern in CAD rather than on paper, layers are only part of the story: a DXF needs closed piece outlines, notches and grain lines as separate entities. When you convert a multi-size PDF with our converter, you choose one size and only that size's lines are extracted into the DXF AAMA file - the multi-size PDF to DXF article explains how sizes are detected and what you can switch afterwards.
FAQ
How do I print only one size of a PDF sewing pattern?
Open the file in a reader that supports layers, such as Adobe Acrobat Reader, open the Layers panel and hide every size except yours by clicking the eye icons. Keep the text, markings and test square layers visible, then print at 100 %.
Why can't I see layers in my PDF pattern?
Either your reader does not support PDF layers (macOS Preview and many browser and phone viewers do not show them) or the pattern was made without layers. Try Adobe Acrobat Reader on a computer; if there is still no layer list, the file has none.
Which layers should I keep when printing a pattern?
Your size, plus the shared layers for text and labels, notches and markings, page frames and the test square. Hide only the other size layers.
Does printing one size use fewer pages?
No. The pages are laid out for the largest size, so every page still prints. You save ink and avoid cutting on the wrong line.
How do I find my size on a pattern without layers?
Use the size legend: each size is usually shown in its own colour or line style. Print in colour if you can, highlight your line before cutting, or trace your size onto pattern paper.