To trace a sewing pattern, lay transparent pattern paper over the original, weight both so nothing shifts, and draw along your size's lines with a sharp pencil and a ruler or curve, then transfer every notch, grain line, dart, dot and label before lifting the paper. Tracing keeps the original intact, lets you use multi-size patterns in several sizes, and gives you a copy you can alter freely. The care is in the markings: an outline without notches and grain is only half a pattern.
Why trace instead of cutting the original
- Multi-size patterns. Cutting out one size destroys the others. Tracing keeps them all.
- Alterations. Fitting changes, such as a full bust adjustment or lengthening, are easier on a copy you can cut and tape.
- Durability. Original tissue tears; a traced copy on sturdier paper lasts longer.
- Overlapping pieces. Many magazine patterns and printed sheets overlap pieces deliberately, so they cannot be cut out at all.
Tools
| Tool | Use | Notes |
|---|---|---|
| Tracing paper or pattern paper | The copy | See-through enough to read lines; sturdy enough to pin |
| Sharp pencil (HB or 2H) or fine marker | Drawing lines | Pencil can be corrected; marker is easier to read later |
| Coloured pencil | Size lines, markings | Helps when tracing more than one size |
| Clear ruler with grid | Straight lines, grain lines, seam allowance | 30–60 cm (12–24") |
| French curve or hip curve | Necklines, armholes, hips | Or trace curves in short strokes |
| Pattern weights | Hold both layers | Cans or flat stones work |
| Tracing wheel and carbon | For opaque paper or onto card | Test on a scrap; spiky wheels mark tissue |
| Pattern notcher or scissors | Notches on the finished copy | Optional |
| Tape | Joining paper, fixing layers | Low-tack on originals |
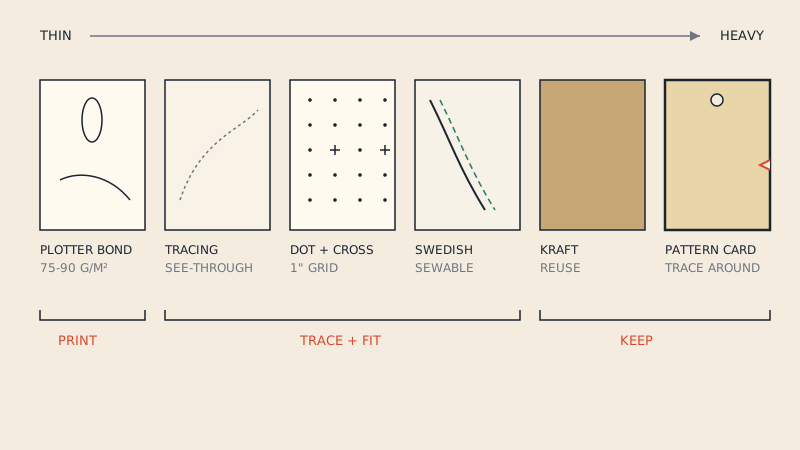
Paper options, from Swedish tracing paper to dot-and-cross paper and kraft, are compared in plotter paper and pattern paper.
Before tracing: find your lines
On a multi-size pattern, highlight your size first, lightly, on the original or on a quick photo of it if you want to keep the original clean. Follow the line all the way round each piece. Size lines cross and merge, especially at shoulders and armholes, and it is easy to jump to a neighbouring size at a crossing.
If you are blending between sizes, for example one size at the bust and another at the hip, mark the blend on the original before tracing. The multi-size patterns guide explains how.
Step-by-step tracing
- Prepare the surface. A large flat table. Lay the original flat; iron creased tissue with a cool, dry iron if needed.
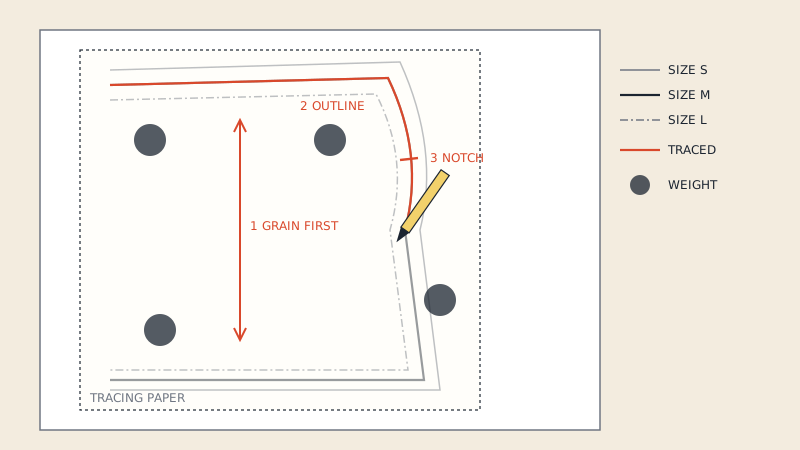
- Place the paper. Lay the tracing paper on top, leaving at least 5 cm (2") margin all around the piece, more if you will add seam allowance.
- Weight both layers. Put weights on the paper close to the area you are tracing. Move them as you go rather than letting the paper float.
- Trace the grain line first. Draw it long, using a ruler. This gives you a reference to realign if the layers shift.
- Trace straight edges with the ruler, corner to corner.
- Trace curves with a curve ruler, or in short overlapping strokes following the line. Keep the pencil upright so the line sits directly over the original, not offset.
- Mark corners precisely, with a small cross where two lines meet.
- Transfer all markings (see below) before moving anything.
- Label the piece.
- Check against the original by lifting one corner at a time and looking for gaps or doubled lines.
Pieces cut on the fold
Trace the half piece and mark the fold edge with the fold symbol. If you will cut a single layer, or need a full piece for a print or plaid, fold your tracing paper along the fold line, trace the half through it onto the other side, and unfold. Check that centre-front stays a straight line.
Very large pieces
If a piece is larger than your paper, join sheets with tape before tracing, not afterwards. Draw a straight reference line across the join so you can check later that it has not shifted.
Transferring the markings
This is where traced patterns most often lose information. Go round each piece with a checklist.
Notches
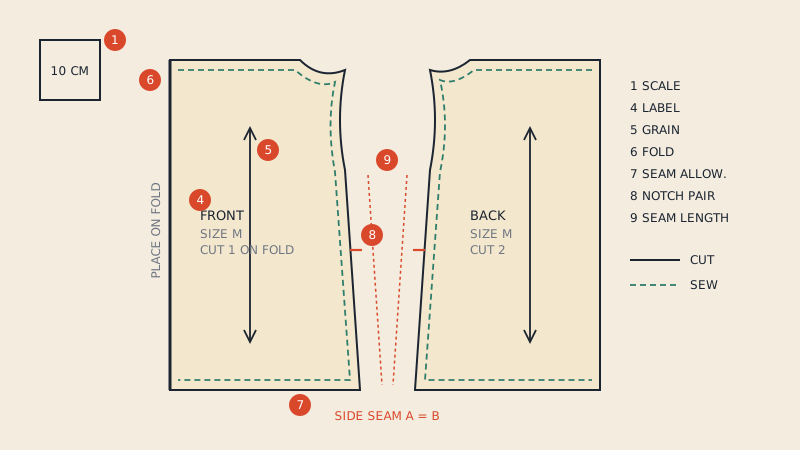
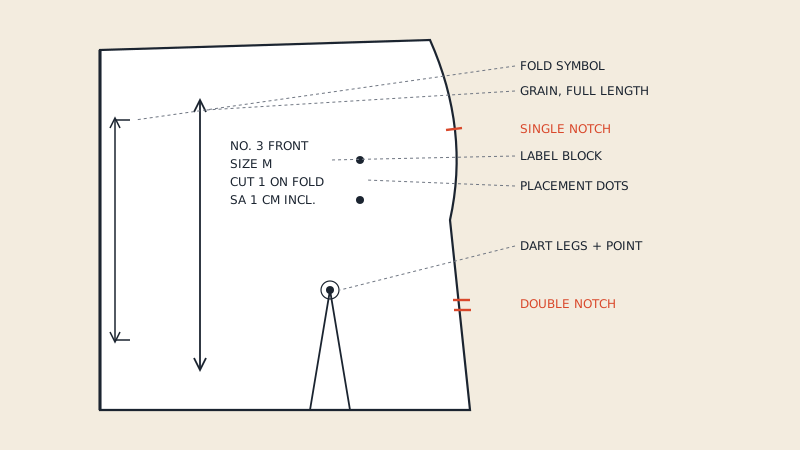
Mark each notch as a short line perpendicular to the edge, crossing the cut line slightly. Keep the grouping: single, double, triple. Double notches are usually drawn as two parallel ticks a few millimetres apart. Conventions are explained in notches in sewing patterns.
Grain line and fold
Trace the full grain arrow with both arrowheads (or one, if the pattern shows a nap direction). Extend it if it is short on the original; a longer grain line is easier to align on fabric.
Darts
Mark both dart legs, the point, and the centre fold line if shown. For a dart, the point matters most: mark it with a dot and a small circle.
Dots, circles and placement marks
Pocket positions, button and buttonhole marks, pleat lines, gathering start and stop points, zipper stops. Mark each with the same symbol the original uses.
Lengthen and shorten lines
Trace these too, if present. They show where an alteration will not distort the shape.
Labels and text
Write on every piece:
- pattern name or number
- piece name and number
- size (and blend, if any)
- cut quantity: "cut 2", "cut 1 on fold"
- whether seam allowance is included, and its width
Adding seam allowance while tracing
Some patterns, especially from magazines and European publishers, are printed without seam allowance. You can trace the net line and add seam allowance afterwards with a ruler or a double pencil (two pencils taped together at the right spacing). Mark both lines: the traced sew line and the new cut line, so notches can be placed on both and the sew line stays visible.
Corners, darts and curves need care when adding allowance: fold darts closed before marking the allowance across them, and extend the lines at corners so the cut edges meet when the seam is sewn.
Tracing with a wheel and carbon
When the copy paper is opaque, such as card or kraft, place dressmaker's carbon (or tracing paper made for pattern transfer) between the original and the copy, carbon side down, and run a tracing wheel along the lines. Use a ruler as a guide for straight lines.
Two cautions: serrated wheels perforate tissue and may damage a pattern you want to keep, and carbon can mark the original if it is face up. A smooth-edged wheel is gentler. For fragile or old originals, see digitizing vintage patterns, which favours methods that touch the tissue as little as possible.
Common tracing mistakes
- Layers shifting mid-trace. Weights near the work, and re-check against the grain line.
- Tracing the wrong size at a crossing. Highlight first.
- Offset lines from a tilted pencil. Keep it upright.
- Missing notches on one side of a seam. Count both sides of each seam.
- No labels. A month later, an unlabelled piece is a guess.
A short check before cutting catches most of these; the 10-point pattern check is designed for it.
Tracing vs digitizing
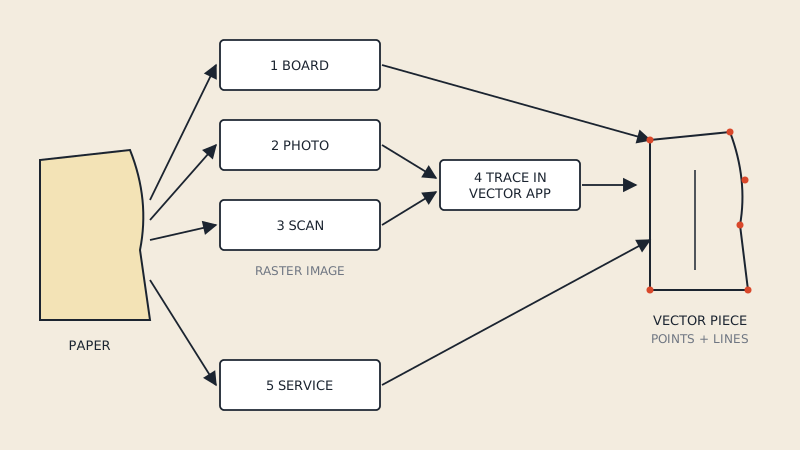
Tracing makes a paper copy. If you need the pattern in a computer, for CAD, 3D or a factory, see how to digitize sewing patterns. A neat traced copy with clear markings is a good starting point for any of those methods. And if the pattern you are tracing came as a vector PDF, you may not need to trace at all to get it into CAD: our converter turns vector PDF patterns into DXF AAMA in the size you choose. It does not work from paper or scans.
FAQ
What paper is best for tracing sewing patterns?
Anything transparent enough to see the lines through and strong enough to pin: Swedish tracing paper, medical exam paper, pattern tracing paper or dot-and-cross paper are common choices. Sturdier, non-woven tracing materials last longer for patterns you reuse.
Should I trace with or without seam allowance?
Trace whatever the original has, and label it. If the pattern has no seam allowance, add it after tracing and keep both lines visible on the copy.
How do I trace notches so they stay accurate?
Draw each notch as a short line at a right angle to the edge, crossing the cut line, and keep single, double and triple groupings. Check that each notch has a partner on the piece it joins.
Can I trace a pattern without tracing paper?
Yes, with a tracing wheel and dressmaker's carbon onto opaque paper, or by taping the original and the copy to a window or light box. A light box is easiest for dark or dense patterns.