There are three ways to use a PDF sewing pattern: print the tiled pages at home on A4 or US Letter and tape them together, send the large-format file (A0 or a 36" roll sheet) to a copy shop, or project the pattern straight onto fabric. Whichever you choose, print at 100 % or "Actual size", never "Fit to page", and measure the test square before you cut anything.
This is the overview. Each route has its own detailed guide, linked below, so this page focuses on choosing a route and on the settings that matter for all of them.
Which file is which
Most PDF patterns arrive as a bundle of several files. Names vary by designer, but the contents are usually:
| File | Paper | Who prints it | Typical use |
|---|---|---|---|
| Print-at-home | A4 (210 × 297 mm) and/or US Letter (8.5 × 11") tiles | You, on a desktop printer | Small patterns, quick starts, no shop nearby |
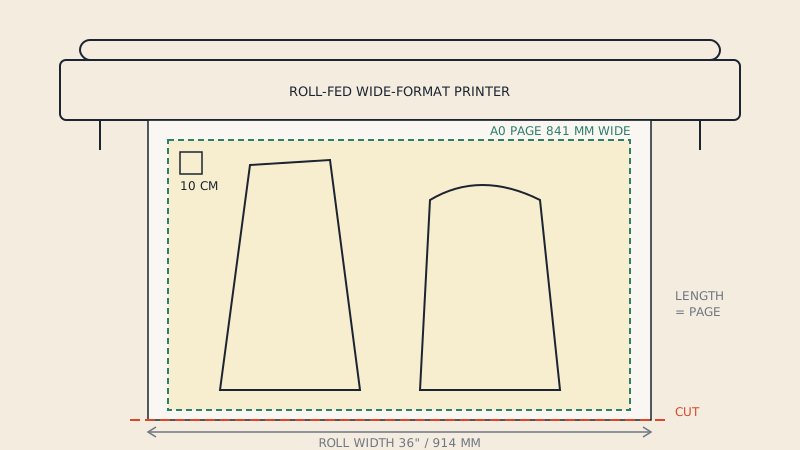
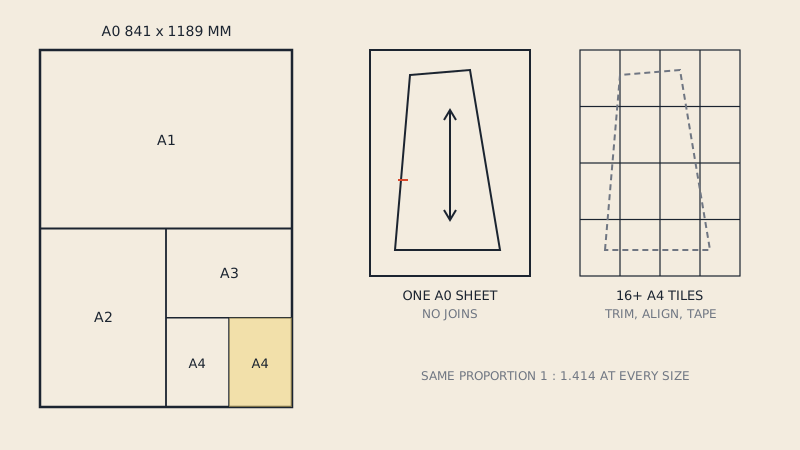
| Copy shop / large format | A0 (841 × 1189 mm), or 36" (914 mm) wide sheets | A copy shop or online print service | Garments with large pieces, fewer taping hours |
| Projector | Screen-sized, often dark background | Nobody: projected onto the cutting table | Cutting directly, frequent sewists |
| Instructions | A4 / Letter | You | Reading, not cutting |
Open each file before printing and check the first page. The test square, the assembly map and a note about which pages to print are usually there.
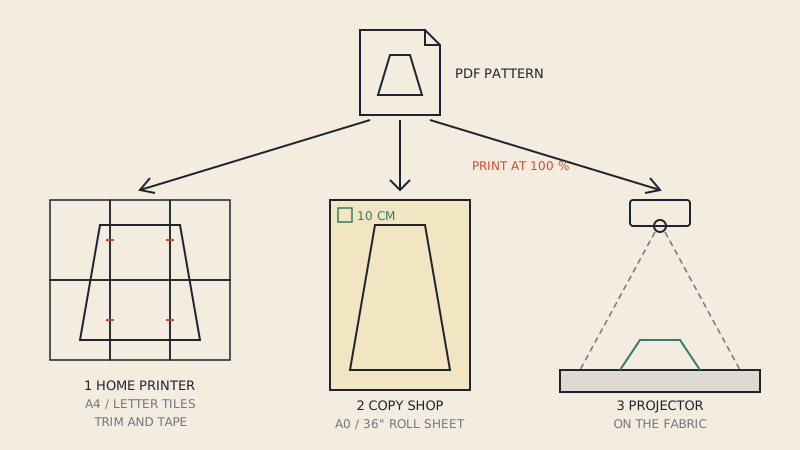
Route 1: printing at home
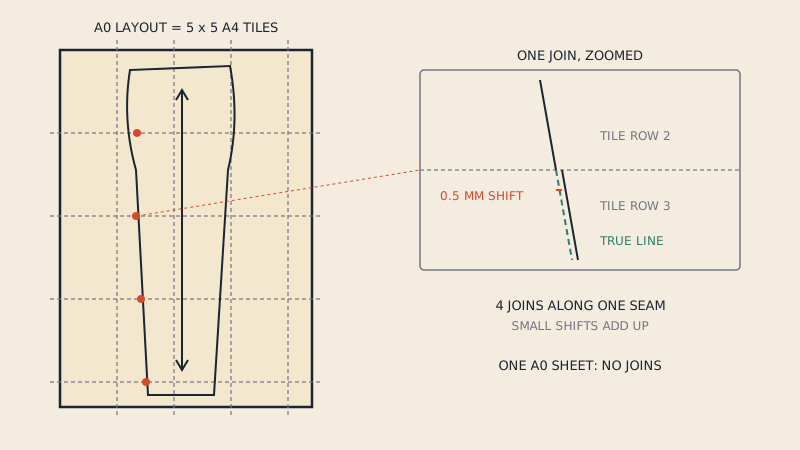
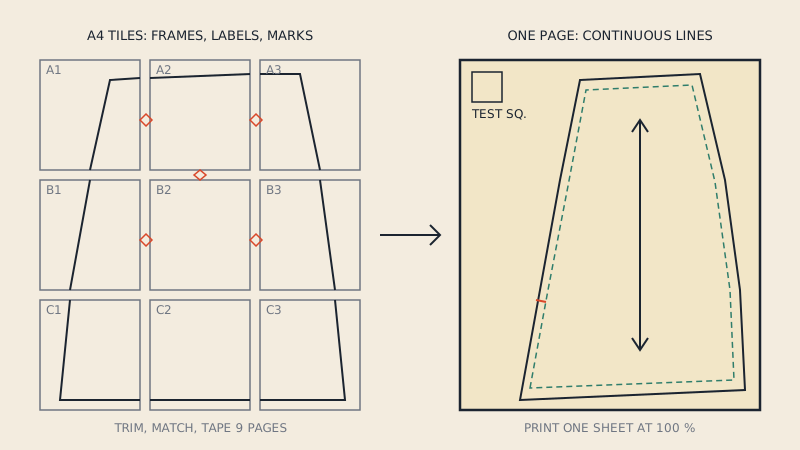
Home printing is the default because everyone has the paper. The trade-off is assembly: a dress might be 30 or more pages that you trim, align and tape, and every join is a chance for a small error to creep in.
The essentials:
- Open the file in a full PDF reader such as Adobe Acrobat Reader. Browser PDF viewers often ignore layers and may scale pages silently.
- Choose the file that matches your paper. Printing the A4 file on Letter paper (or the other way round) cuts off part of each page.
- Set the scale to 100 % or Actual size.
- Print only page 1 first, measure the test square, then print the rest.
- Assemble in the order shown on the assembly map.
Printer settings, paper choice and ink-saving tips are covered in printing sewing patterns on A4 or US Letter at home.
Route 2: the copy shop file
A large-format file puts the whole pattern, or a big part of it, on one sheet printed by a wide-format printer. No taping, no drift across joins, and you can trace or cut straight from it. You pay per sheet and need a shop or an online service that prints from a roll.
What matters at this stage is getting the right file and the right instruction to the printer:
- Send the large-format file, not the tiled one.
- Ask for printing at 100 %, no scaling, black-and-white line drawing unless the pattern is colour-coded by size.
- Check the sheet dimensions against the shop's roll width before you go.
A0 and its relatives are explained in how to print an A0 sewing pattern; what to say and send to the shop is in copy shop printing for sewing patterns. If you are deciding between the formats, A0 vs A4 PDF patterns compares them on time, cost factors and accuracy.
Some patterns only come as home-print tiles. In that case the tiles can be assembled into a single sheet for the copy shop, which is what a one-page PDF pattern is.
Route 3: projecting
A projector mounted above the cutting table shows the pattern at full size directly on the fabric. You skip paper entirely, but you need a calibrated setup and, ideally, a projector file with thicker lines on a dark background. Learn how calibration works before buying anything.
The settings that keep your pattern to scale
Every route depends on the pattern staying at 1:1. These are the settings that break it most often.
Scale: 100 %, Actual size, no fitting
In Adobe Acrobat Reader's print dialog, under Page Sizing & Handling, choose Actual size. Options labelled "Fit", "Shrink oversized pages" or "Fit to printable area" reduce the page by a few percent so it fits inside the printer's margins. A few percent sounds small; on a 100 cm (39") hip it is several centimetres.
Other readers and operating systems hide this setting in different places, and some printers apply their own scaling in the driver. If your test square comes out wrong even at 100 %, the guide to fixing a PDF pattern that is not printing to scale walks through each place it can happen.
The test square
Every well-made PDF pattern includes a test square, commonly 10 cm, 1" or 3", often both a metric and an imperial one. Measure it with a ruler, not a tape measure, after printing and before cutting. If it is off by more than about 1 mm, stop and fix the setting.
Layers: print only your size
Many multi-size patterns put each size on its own PDF layer. In Acrobat Reader, open the Layers panel, switch off the sizes you do not need, and print. Fewer lines mean fewer mistakes when cutting.
A copy shop usually prints whatever is visible when the file is opened. If you want a single size on a large sheet, switch layers off and save a copy (or print to PDF) before sending it, and check the saved copy.
Paper size, orientation and margins
- Match the file to the paper size: A4 file on A4 paper, Letter file on Letter paper.
- Let the reader choose orientation automatically, or set it to match the pages; rotated pages lose their edges.
- Borderless printing on home printers often enlarges the image slightly. Leave it off.
Choosing a route
| If you… | Consider |
|---|---|
| Sew small items, or only occasionally | Home printing |
| Sew dresses, coats or trousers with large pieces | Copy shop file |
| Hate taping or want maximum accuracy on large pieces | Copy shop file, or a one-page file made from tiles |
| Cut many projects a month and have the space for a mount | Projector |
| Have no printer at all | Copy shop, online print service or projector |
There is no wrong answer. Many sewists print small accessory patterns at home and send garments to a copy shop.
Checking a printed pattern before cutting
Whatever route you used:
- Measure the test square in both directions.
- Measure one long piece edge against a dimension given in the instructions, if there is one.
- Check that every piece listed in the instructions is present, including small ones such as facings and pocket bags.
- Confirm notches and grain lines are visible.
Then trace or cut your size.
If you have a pattern only in tiles and want the large-format or projector-friendly versions, or need the pattern split into a different paper size than the designer supplied, our service can produce those print files from a vector PDF: make print files from your pattern.
FAQ
What setting should I use to print a PDF sewing pattern?
Print at 100 % or Actual size, with no fit-to-page, shrink or borderless options. Then measure the test square on the first page before printing the rest.
Can I print a PDF sewing pattern at a copy shop?
Yes. Send the large-format file (A0 or a 36" wide sheet) and ask for printing at 100 % with no scaling. If the pattern only has home-print tiles, it can be assembled into a single large sheet first.
Why is my printed pattern the wrong size?
Usually because the print dialog was set to fit or shrink the page, or the printer driver applied its own scaling. Set Actual size, disable borderless printing, and check the test square again.
How do I print only one size of a PDF pattern?
If the pattern has layers, open the Layers panel in Adobe Acrobat Reader and hide the sizes you do not need before printing. Browser PDF viewers often do not show layers.
Do I need to print the instructions?
No. Instructions can be read on screen. Only the pattern pages need printing, and the first pattern page or the cover usually tells you which pages those are.