To print a sewing pattern on A4 or US Letter at home, choose the file version that matches your paper, print at 100 % with borderless mode off, use ordinary 80 g/m² (20 lb) copy paper, and print page 1 first to check the test square. Grayscale or draft mode is usually fine for single-size patterns and saves a lot of ink; keep colour for multi-size patterns that tell sizes apart by colour.
This article is about the home-printing setup itself: paper, printer modes and what to do with the pages afterwards. Scaling problems have their own troubleshooting guide.
A4 or US Letter: use the file for your paper
| A4 | US Letter | |
|---|---|---|
| Size | 210 × 297 mm (8.27 × 11.69") | 216 × 279 mm (8.5 × 11") |
| Used in | Most of the world | US, Canada, Mexico and some others |
| Difference | 18 mm (about 3/4") taller | 6 mm (1/4") wider |
Most PDF patterns for home printing either come in two versions or use a page layout that fits inside both - a "universal" frame no larger than the overlap of the two sizes. Check the file name or the instructions. If you only have the "wrong" version, US Letter vs A4 explains what you lose at 100 % and what to do about it.
Printer settings, in order
Set these once, save them as a preset if your driver allows, and you will not need to think about them again.
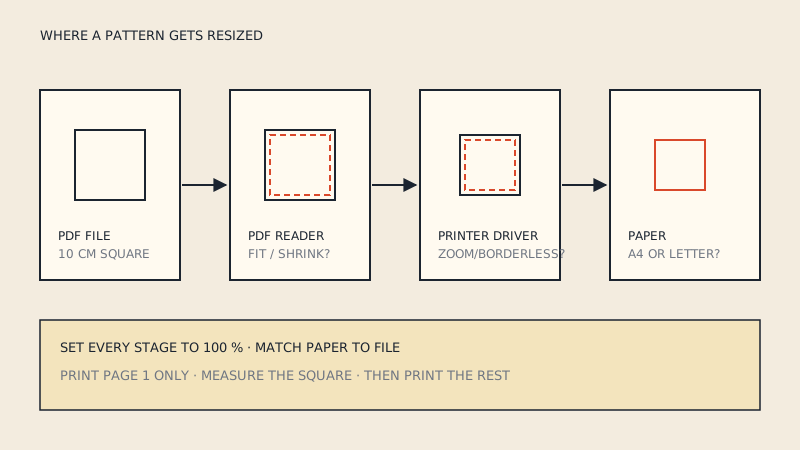
- Paper size: the same as the file (A4 or Letter), in both the PDF reader and the printer driver.
- Scale: 100 % or Actual size. No fit, shrink or fill.
- Orientation: auto or portrait. Most readers rotate landscape pages correctly on their own; do not force landscape unless the instructions say so.
- Borderless: off. Borderless printing enlarges the image slightly so it bleeds off the edges, which breaks the scale and crops frame lines.
- Two-sided printing: off. Pattern pages are taped edge to edge; a print on the back shows through and gets in the way.
- Quality: draft or normal (see below).
- Colour: grayscale unless the pattern needs colour to tell sizes apart.
- Page range: print page 1 only, measure the test square, then print the rest.
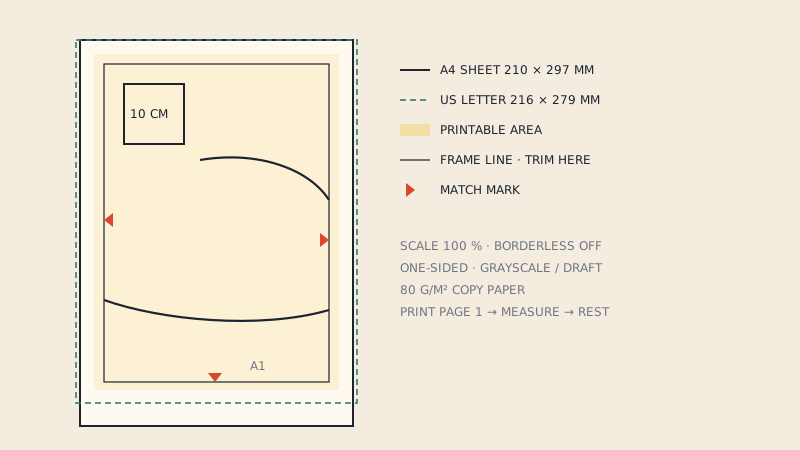
Why "borderless" is the wrong choice
It sounds right - no white border, so the pages fit together better. In practice the reverse happens. To guarantee there is no white edge, the printer scales the image up by a small amount and lets the excess fall off the paper. You lose the frame lines and part of the match marks, and the scale is no longer 100 %.
Home patterns are designed for the margins your printer leaves. The frame line sits inside them, and you trim to the frame.
Saving ink
A 40-page pattern prints a lot of lines, but most of the ink cost comes from fills, grey backgrounds and colour. Options that help without hurting accuracy:
- Grayscale or black only. Single-size and black-and-white patterns lose nothing.
- Draft or economy mode. Lines get lighter but stay where they are; the scale does not change. Check that thin dashed lines (often used for seam lines or smaller sizes) are still visible.
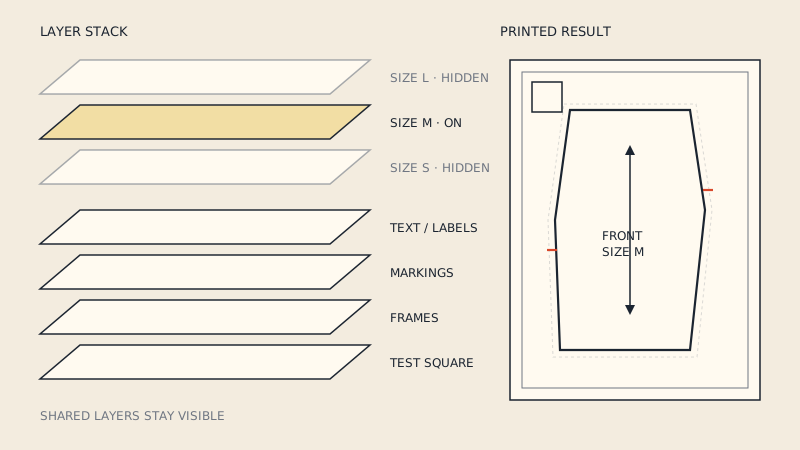
- Hide unneeded layers. Hiding other sizes, and cover art if it is on its own layer, means fewer lines on every page. See PDF pattern layers.
- Skip blank pages. Many patterns list pages that carry no pieces, or pages for views you are not making.
- Do not print the instructions. Read them on screen or print only the pages with diagrams you want next to the machine.
What not to do: do not reduce the scale to fit more on a page, and do not print "2 pages per sheet". Both change the size of the pattern.
Which paper to use
| Paper | Weight | Good for | Notes |
|---|---|---|---|
| Standard copy paper | 75-80 g/m² (20 lb) | Almost everything | Cheap, feeds reliably, easy to trace through |
| Heavier copy paper | 90-100 g/m² (24-27 lb) | Patterns you will use many times | Stiffer, easier to trace around; harder to see through |
| Recycled paper | 75-80 g/m² | Everyday printing | Fine as long as it feeds straight |
| Card stock | 160 g/m² and up | Small templates (pockets, collars) | Check that your printer accepts it |
| Photo or glossy paper | - | Not recommended | Expensive, slow, smudges, and tape does not stick well |
Use one paper type for the whole print job. Different papers can feed slightly differently through the same printer, and that shows up as pages that are a millimetre out.
If you will trace your size anyway, the cheapest copy paper is enough: the printed tiles are only a master. More on tracing materials in our guide to plotter and pattern paper.
Printing reliably
- Print the whole pattern in one job, on one printer. Mixing printers is a common cause of pages that do not meet.
- Fan the paper before loading to stop several sheets feeding at once.
- Do not overfill the tray. A tight stack feeds at a slight angle more often.
- Let ink dry before stacking pages, especially on inkjets with heavy line work.
- Keep the pages in order as they come out. Most printers output face down in the correct order; some output face up in reverse.
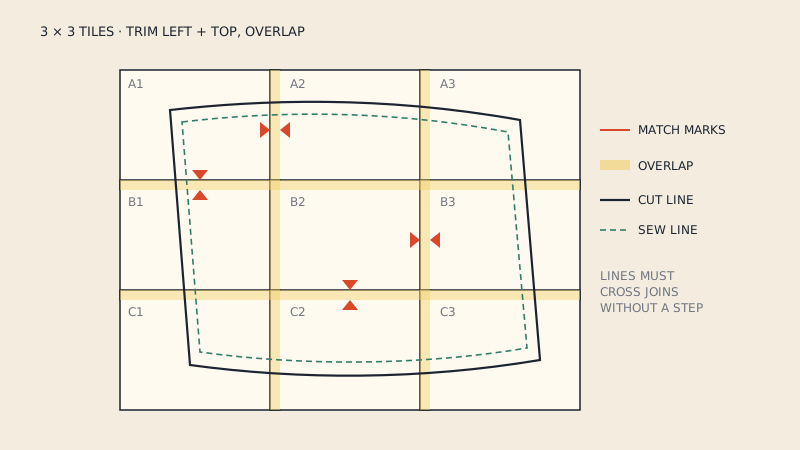
Then lay out and tape the pages - the assembly guide covers trimming and taping order.
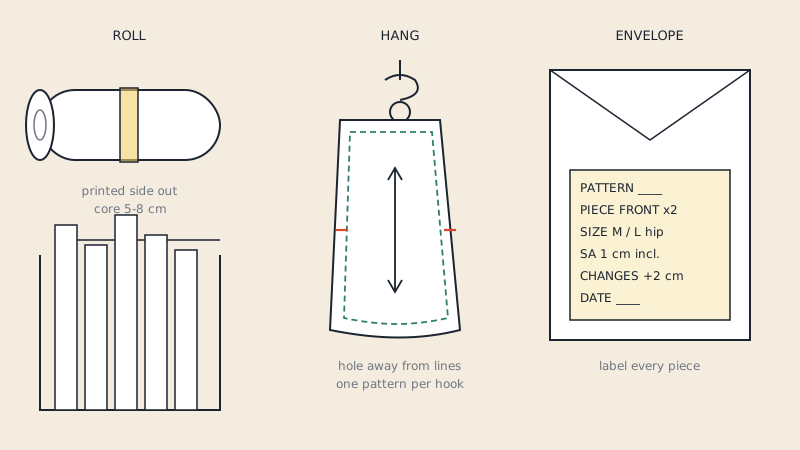
Storing printed tiles in a binder
An unassembled tiled pattern stores beautifully flat, which a taped sheet does not.
- Print a second copy only if you need it. Usually the PDF is your backup.
- Keep pages in page order in clear A4 or Letter sheet protectors, two pages back to back per sleeve.
- Put the assembly map and the test square page first, followed by the instructions you printed.
- Label the spine with the pattern name and the size you printed.
- Store traced pieces separately, folded or rolled, in a labelled envelope - see storing printed and traced patterns.
If you have already assembled the sheet, a binder no longer works; roll the sheet around a tube instead of folding it, so the joins do not crease.
When home printing stops making sense
Home printing is ideal for small items, children's clothes and patterns you sew once. For coats, gowns or anything you will make repeatedly, a single large sheet is faster and avoids tile joins. If the pattern only came as A4 or Letter tiles, our converter assembles the tiles into a one-page copy-shop file and also splits it into A0 to A3 sheets, without the original tile frames.
FAQ
What printer settings should I use for a PDF sewing pattern?
Paper size matching the file, scale at 100 % or Actual size, borderless off, two-sided off, and grayscale unless sizes are distinguished by colour. Print page 1 first and measure the test square.
Should I print sewing patterns borderless?
No. Borderless mode enlarges the image slightly so it bleeds off the paper, which changes the scale and crops frame lines and match marks. Patterns are designed to be printed with normal margins.
Can I print a sewing pattern in draft mode to save ink?
Usually yes. Draft mode makes lines lighter but does not move them, so the scale stays correct. Check that thin dashed lines are still visible on the first page.
What paper is best for printing PDF patterns at home?
Ordinary 75-80 g/m² (20 lb) copy paper works for almost every pattern. A slightly heavier 90-100 g/m² paper is sturdier for patterns you will reuse; avoid glossy photo paper.
Can I print an A4 pattern on US Letter paper?
You can print it at 100 %, but Letter is 18 mm shorter, so a strip at the bottom of each page may be cut off. Use the Letter version of the file if one exists, and do not use fit-to-page.