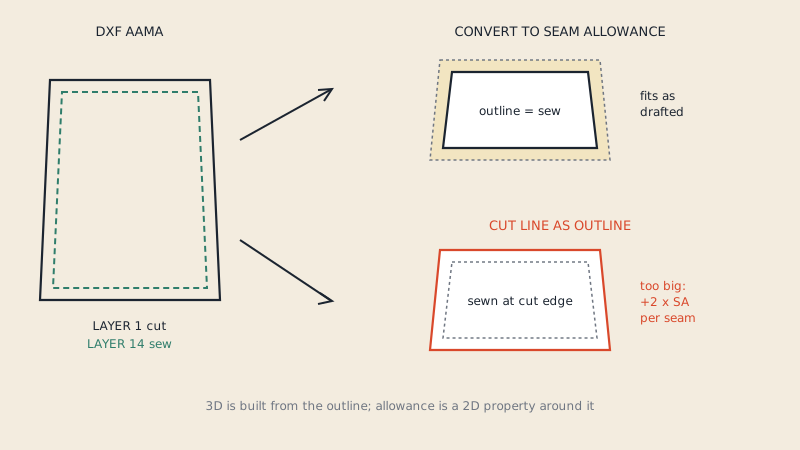
In CLO3D the pattern outline is the sewing line, and seam allowance is a separate property drawn around it in the 2D window. That is why a pattern with allowance built into its outline drapes too big: CLO sews the cut edges together. When you import a DXF that has both a cut line and a sew line, use the import options so the sew line becomes the outline and the allowance is converted into CLO seam allowance. For patterns drawn in CLO, add allowance with the Seam Allowance tool and set widths and corners in the Property Editor.
Why the outline has to be the sew line
A physical garment is sewn along the stitching line, with the allowance folded inside. A 3D simulation does the same thing, but it needs to know which line is which. In CLO, the pattern piece's outline is where seams are joined and where fabric is simulated. The allowance is a 2D attribute: it is shown around the piece, it is exported as the cut line, and it appears on printed patterns, but the garment in the 3D window is built from the net shape.
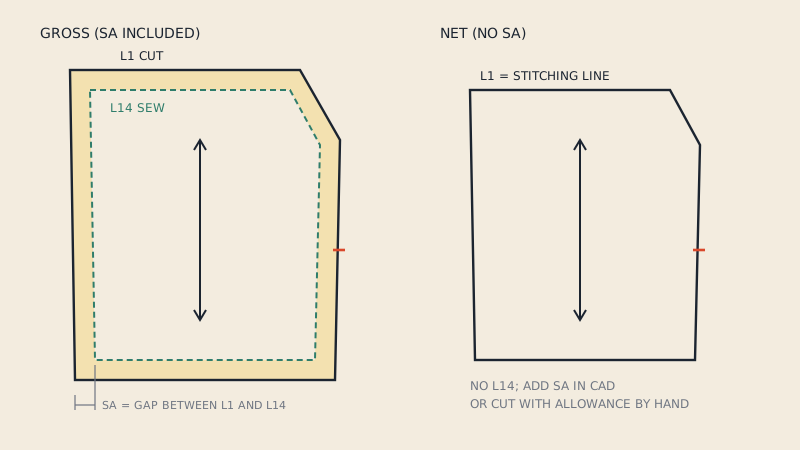
If a gross pattern (one whose outline already includes allowance) is imported as is, every seam is sewn at the cut edge. A bodice with 1 cm allowance on four vertical seams comes out about 8 cm larger around the body than intended, shoulders sit wider and armholes come out bigger. The fit looks wrong for reasons that have nothing to do with the pattern's drafting.
The general difference between net and gross patterns, and typical widths, is in the seam allowance guide.
Importing patterns that have seam allowance
How allowance arrives in CLO depends on what the file contains.
DXF AAMA with both cut line and sew line
A DXF AAMA file from pattern CAD usually stores the cut line as the piece boundary on layer 1 and the sew line on layer 14. CLO's DXF import dialog has options for this situation:
- Convert to Seam Allowance: brings the allowance in the CAD file into CLO as CLO seam allowance. CLO's documentation notes that this option is meant for AAMA-format DXF files.
- Swap Cutting Line and Sewing Line: for files where the pattern CAD and CLO define the two lines the other way round.
Import through File > Import > DXF (AAMA/ASTM), choose the correct unit and the seam allowance option, then check the result. The step-by-step import, including scale and arrangement, is in how to import a DXF pattern into CLO3D.
DXF with only one outline
If the file has only layer 1 and no sew line, CLO cannot know whether the outline is net or gross. Find out first (see seam allowance included or not):
- Net outline: import as is, then add allowance in CLO if you need it for export or printing.
- Gross outline with no sew line: the file needs to be fixed at the source, or you need to reduce the outline by the allowance yourself. Asking the pattern maker for a file with a sew line is the cleanest solution.
Patterns from a PDF
CLO does not read PDF sewing patterns as pieces. A vector PDF is converted to DXF first, and the converter keeps what the PDF draws: if the PDF has a dashed sew line inside the cut line, the DXF gets both. Our converter's preview reports, piece by piece, whether seam allowance was detected, and the resulting DXF AAMA file has the cut line on layer 1 and the sew line on layer 14. Background is in PDF to DXF with or without seam allowance.
Checking the import
After importing, check three things before sewing anything in 3D:
- Outline vs allowance. In the 2D window, the solid piece outline should be the sew line, with the allowance shown around it. If the allowance appears as an internal line inside the piece, or not at all, the import option did not match the file.
- Width. Measure the allowance on a couple of edges. It should match the pattern's stated width, such as 1 cm.
- Size. Measure a known dimension along the outline, for example a waistband length or a centre back length, and compare it with the pattern's sew-line measurement.
If something looks wrong, delete the imported pieces and import again with the other option, rather than editing piece by piece. Common import failures are listed in CLO3D DXF import problems.
Adding seam allowance in CLO
For pieces drafted in CLO or imported as net patterns:
- In the 2D window, select the Seam Allowance tool.
- Click a segment to add allowance to that edge, or select the piece to add it to all edges.
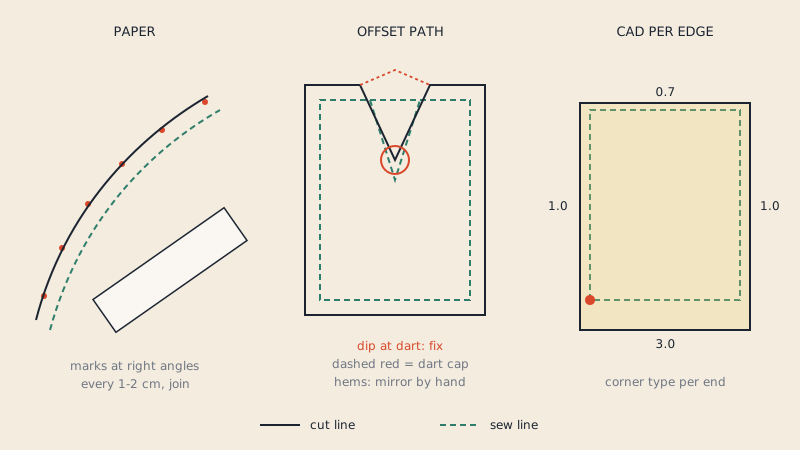
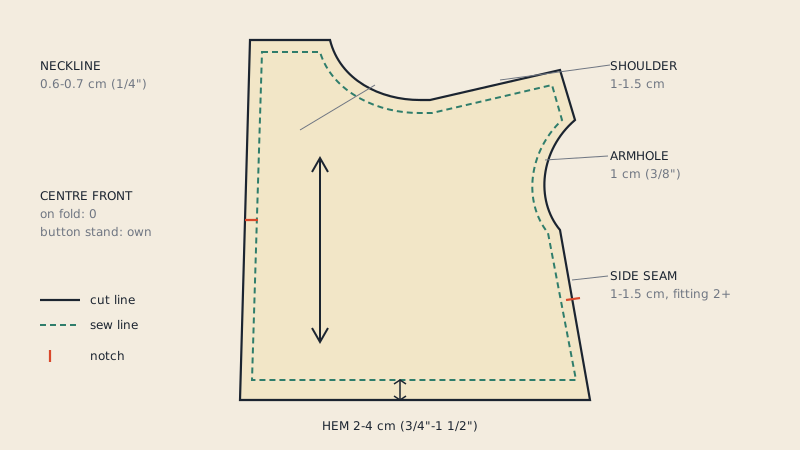
- In the Property Editor, set the width. Different edges can have different widths, for example 0.7 cm on the neckline and 3 cm on the hem.
- Set the corner types where needed (see below).
Because allowance is a property, it follows the outline when you edit the pattern: lengthen a piece and the allowance is recalculated.
Corners
CLO lets you choose how the allowance behaves at the start and end of a segment and where two allowances meet. Its documentation lists six options for an intersection and three each for the start and end of a segment. To change one, select the Seam Allowance tool, click the segment point at that corner, and pick the type in the Property Editor.
Typical choices:
- Seam junctions such as shoulder and armhole: allowances extended until they meet.
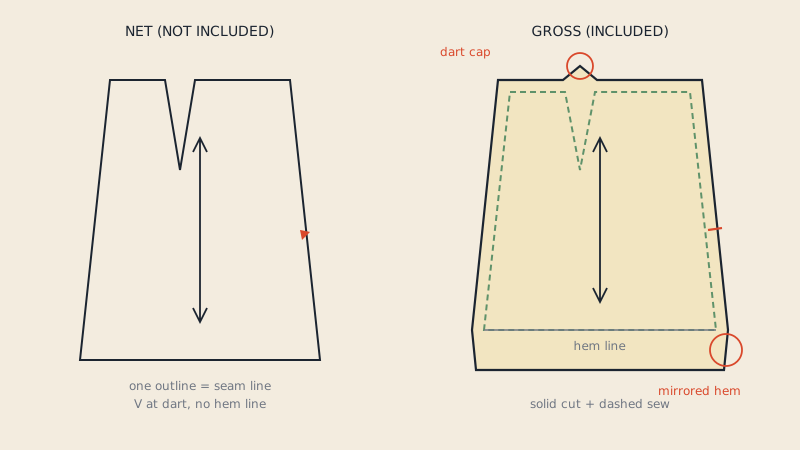
- Hems on tapered or flared pieces: a mirrored corner, so the hem folds flat.
- Very sharp points: a cut-off corner to reduce bulk.
The reasoning for each corner type, independent of software, is in how to add seam allowance.
Darts
At a dart added with CLO's dart function, the segment point inside the dart offers extra cap options in addition to the usual intersection types, so the allowance follows the closed dart. Darts drawn as plain notched outlines do not get this, which is one reason to define darts as darts.
Removing seam allowance
To remove allowance from an edge, select it with the Seam Allowance tool and delete it; repeat for other edges, or select the whole piece. This removes the CLO allowance property only. It does not shrink an outline that was imported gross: if the cut line became the outline, deleting allowance changes nothing about the 3D size, and the piece still needs to be re-imported with the correct option or reduced.
Net patterns for 3D, gross patterns for cutting
A useful habit is to keep the master pattern net with allowance as a property, and let the software produce the gross version when you need it:
| Use | Line you need | In CLO |
|---|---|---|
| 3D simulation and fitting | Sew line | Pattern outline |
| Physical cutting, plotting | Cut line | Allowance shown and exported |
| Exchanging with pattern CAD | Both | DXF export with allowance |
| Printing a paper pattern | Cut line, ideally with sew line | Print or export with allowance visible |
This way, a fit change made in 3D updates both lines at once, and you never have two versions of the pattern drifting apart.
FAQ
Does CLO3D simulate seam allowance?
The 3D garment is built from the pattern outline, which should be the sew line. Seam allowance is a 2D property shown around the piece and used for export and printing.
Why is my imported pattern too big in CLO3D?
The cut line was most likely imported as the pattern outline, so the seams are sewn at the cut edge. Re-import the DXF with the seam allowance conversion option, or with the cutting and sewing lines swapped if the file defines them the other way round.
How do I add seam allowance in CLO3D?
Select the Seam Allowance tool in the 2D window, click the segments or the piece, and set the width in the Property Editor. Corner types at each end can be chosen there too.
How do I remove seam allowance from a pattern in CLO3D?
Select the allowance with the Seam Allowance tool and delete it. If the outline itself includes allowance from a gross import, re-import the pattern with the correct seam allowance option instead.