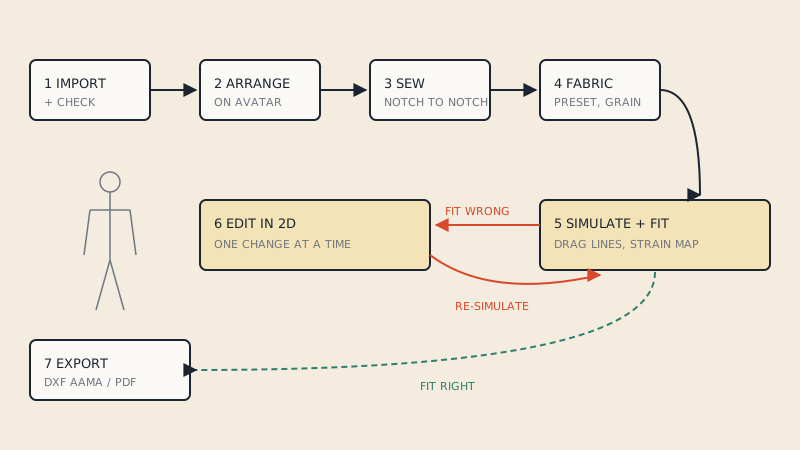
A flat pattern becomes a 3D sample in CLO3D in six stages: import the pieces, arrange them around the avatar, sew the seams, assign fabric, simulate, and check the fit. Then comes the part that makes 3D worth it: change the pattern in 2D, watch the garment update, and export the corrected pattern. This guide follows that loop with a real pattern in mind rather than one drafted inside CLO.
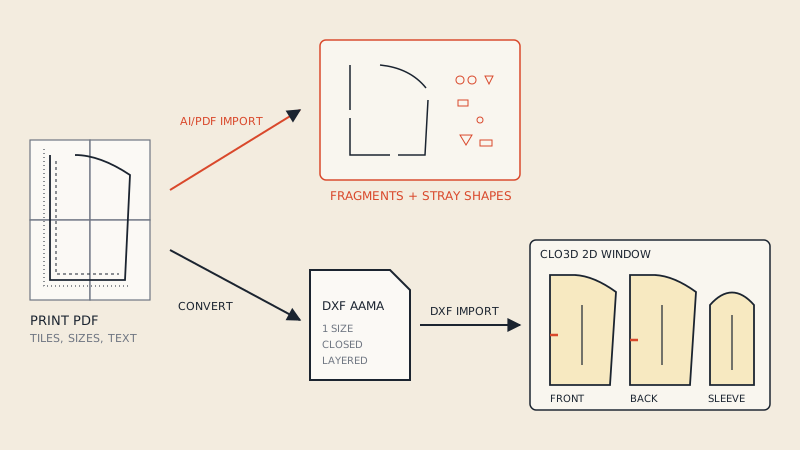
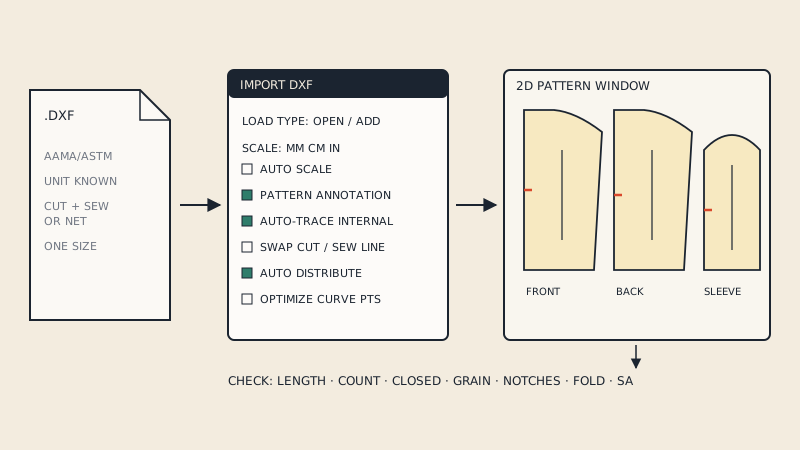
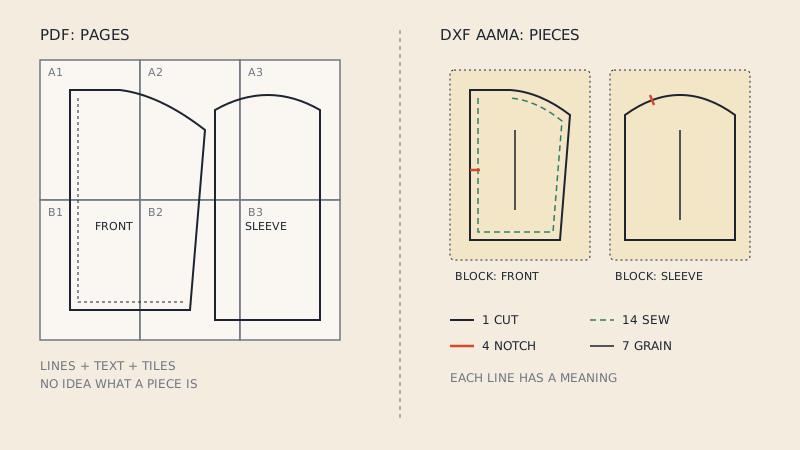
It assumes your pieces are already in CLO and checked. If not, start with importing a DXF into CLO3D, and if you only have a PDF, with getting a PDF pattern into CLO3D.
The loop at a glance
| Stage | Main work | Relative effort |
|---|---|---|
| Import and check | Pieces, scale, grain, notches | Short |
| Arrange | Place pieces on arrangement points | Short |
| Sew | Connect every seam | Usually the longest manual step |
| Fabric | Assign fabric and properties | Short |
| Simulate and fit | Drape, read fit maps | Repeated many times |
| 2D edits | Alter pieces, re-simulate | The real design work |
| Export | Corrected pattern, renders | Short |
Effort depends on the garment and your experience; collars, linings and pleats add a lot.
1. Set up the avatar first
Choose and size the avatar before arranging anything. A pattern drafted for a size 38 (US 8) body draped on a default avatar of different proportions will show fit problems that are not in the pattern.
- Pick an avatar close to the size the pattern was made for.
- Enter the key body measurements (bust, waist, hip, height) if you are fitting to a person or a size chart.
- Put the avatar in a neutral pose for arranging; you can animate or pose it later.
Note the avatar's measurements alongside the pattern. When you compare fit later, you need to know what body you fitted to. Ease, the difference between body and garment, is what you are really judging.
2. Prepare the pieces in 2D
A few minutes in the 2D window saves time in every later step.
- Unfold fold pieces. A half front cut on fold needs to become a full piece, or a symmetric pair, before sewing.
- Make left and right pairs. Pieces cut twice usually need a mirrored copy. CLO can create linked symmetric copies, so an edit on one side updates the other.
- Name pieces if the file did not. "FRONT", "BACK", "SLEEVE" make sewing far easier than numbered patterns.
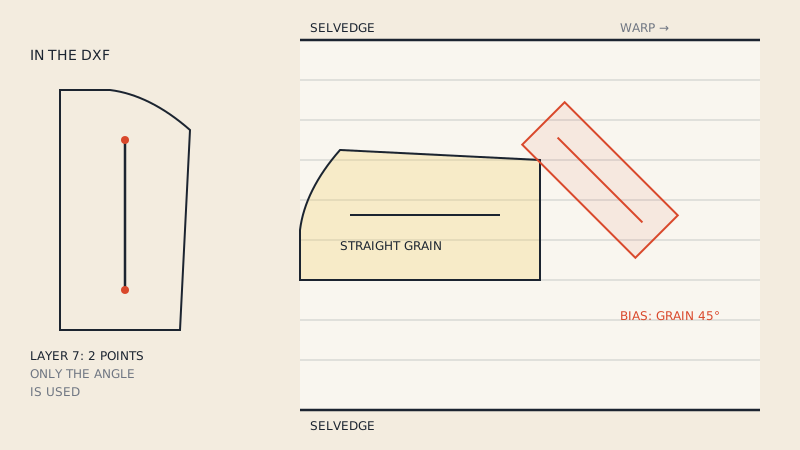
- Check grain on every piece. The grain sets which way the fabric's warp runs, which changes drape. Grain lines in DXF explains what happens when it is wrong.
- Decide on seam allowance. For simulation, the sew line is what matters. If your pieces include allowance, make sure CLO treats it as allowance and not as part of the piece.
3. Arrange pieces around the avatar
CLO shows arrangement points around the avatar: positions for front body, back body, arms, waist and so on. Select a piece in 3D and click an arrangement point to wrap it into place.
Tips for real patterns:
- Arrange the large body pieces first, then sleeves, then small pieces such as collars, cuffs and pockets.
- Place each piece on the correct side: front pieces in front, back pieces behind. A front placed facing inward will simulate inside out.
- Leave small gaps between pieces and the avatar. Pieces that intersect the body at the start simulate badly.
- Pieces that belong on top of others (a pocket on a front, a facing inside a front) can be given a layer order so CLO knows which sits outside.
4. Sew the seams
Sewing connects edges that will be stitched together. CLO has tools for sewing segment to segment and for free sewing between any two points along an edge, which you need when a seam joins part of an edge.
This is where a good pattern pays off:
- Notches show where seams start, stop and match. With notches imported, you can sew from notch to notch rather than estimating. See how notches are stored in DXF AAMA.
- Seam lengths should match where they are meant to. If a sleeve cap is longer than the armhole by more than intended ease, CLO will show puckering or pulling. Walking the seams before 3D catches this.
- Sewing direction matters. Sew edges in the same direction; a crossed seam twists the garment in simulation.
Work methodically: side seams, shoulder seams, then sleeves, collar, facings. Check each seam in 3D as you go.
5. Assign fabric
Each piece needs a fabric. CLO's fabric settings combine physical properties (stretch, bending, weight, thickness) and appearance (texture, colour). Start with a preset close to the real cloth: a shirting, a denim, a jersey.
For fit work, physical properties matter far more than appearance. A pattern for jersey draped as woven fabric will look too tight; a woven pattern draped as jersey will look too loose. Some studios measure their real fabrics for accurate property values; for early fit checks, a close preset is usually enough.
Assign interfacing-like stiffness to collars, cuffs and waistbands, or they collapse in simulation.
6. Simulate and check fit
Run the simulation and let the garment settle. Then look at it the way a fitter would, and use CLO's maps as a second opinion.
- Visual check: drag lines, pulling at the bust or across the back, gaping necklines, twisting side seams, hems that dip.
- Fit or strain maps show where the fabric is stretched or under stress. Strong colour concentrations point to areas that are too tight.
- Cross-sections and measurements: check garment measurements against the avatar to confirm the ease.
- Movement: change the pose. Armholes and sleeves that look fine at rest may pull with arms raised.
If something looks wrong, ask first whether it is a pattern problem or a setup problem: wrong grain, wrong fabric, a mis-sewn seam, a piece arranged inside out. These look like fit issues but are not.
7. Make the corrections in 2D
This is the reason to sample in 3D. Change the pattern in the 2D window, for example let out a side seam, lower a neckline, adjust a dart, add length, and the 3D garment updates.
- Make one change at a time and re-simulate, so you know what each change did.
- Keep symmetric pieces linked, so both sides change together.
- Walk seams again after any change to a seamed edge: the matching edge usually needs the same change.
- Save versions. A named file per fitting round makes it easy to go back.
8. Export the results
When the fit is right:
- Export the pattern as DXF AAMA for pattern CAD, factories and markers, or lay it out as a PDF for printing. The difference is covered in DXF vs PDF for sewing patterns.
- Render images or turntables for line sheets and approvals.
- Write down the avatar measurements, fabric presets and changes made, so the sample can be repeated.
If the pattern came from a PDF and you now need print files for a physical sample, a DXF can be laid out and split into copy-shop and home-print sheets; our converter does this from a DXF upload.
Common workflow mistakes
| Mistake | Effect | Avoid it by |
|---|---|---|
| Wrong avatar size | False fit problems | Size the avatar before arranging |
| Fold pieces left as halves | Half garments, odd sewing | Unfold in 2D first |
| Allowance treated as piece outline | Garment too big | Check cut and sew line roles |
| Grain missing or wrong | Wrong drape | Check grain per piece |
| Seams sewn in opposite directions | Twisted seams | Sew edges in the same direction |
| Many changes at once | Unclear cause and effect | One change per simulation |
FAQ
What are the main steps to make a 3D sample in CLO3D from a pattern?
Import and check the pieces, arrange them around the avatar, sew the seams, assign fabric, simulate and check fit, then make corrections in 2D and export. The fit check and 2D edits are repeated until the sample is right.
Do I need notches to sew patterns in CLO3D?
Not strictly, but they help a lot. Notches show where seams start, stop and match, so you can sew notch to notch instead of estimating, which is faster and more accurate.
Why does my garment look wrong in CLO3D even though the pattern is correct?
Often the setup, not the pattern, is at fault: wrong avatar size, wrong fabric preset, grain set in the wrong direction, a piece arranged inside out, or a seam sewn in the wrong direction.
Can I edit the pattern in CLO3D and export it back to DXF?
Yes. Edits in the 2D window update the 3D garment, and the corrected pattern can be exported as DXF AAMA for pattern CAD or production.
Should the pattern have seam allowance for CLO3D simulation?
CLO simulates on the sew line, so either a net pattern or one with separate cut and sew lines works. A single outline that includes allowance makes the garment simulate too big.